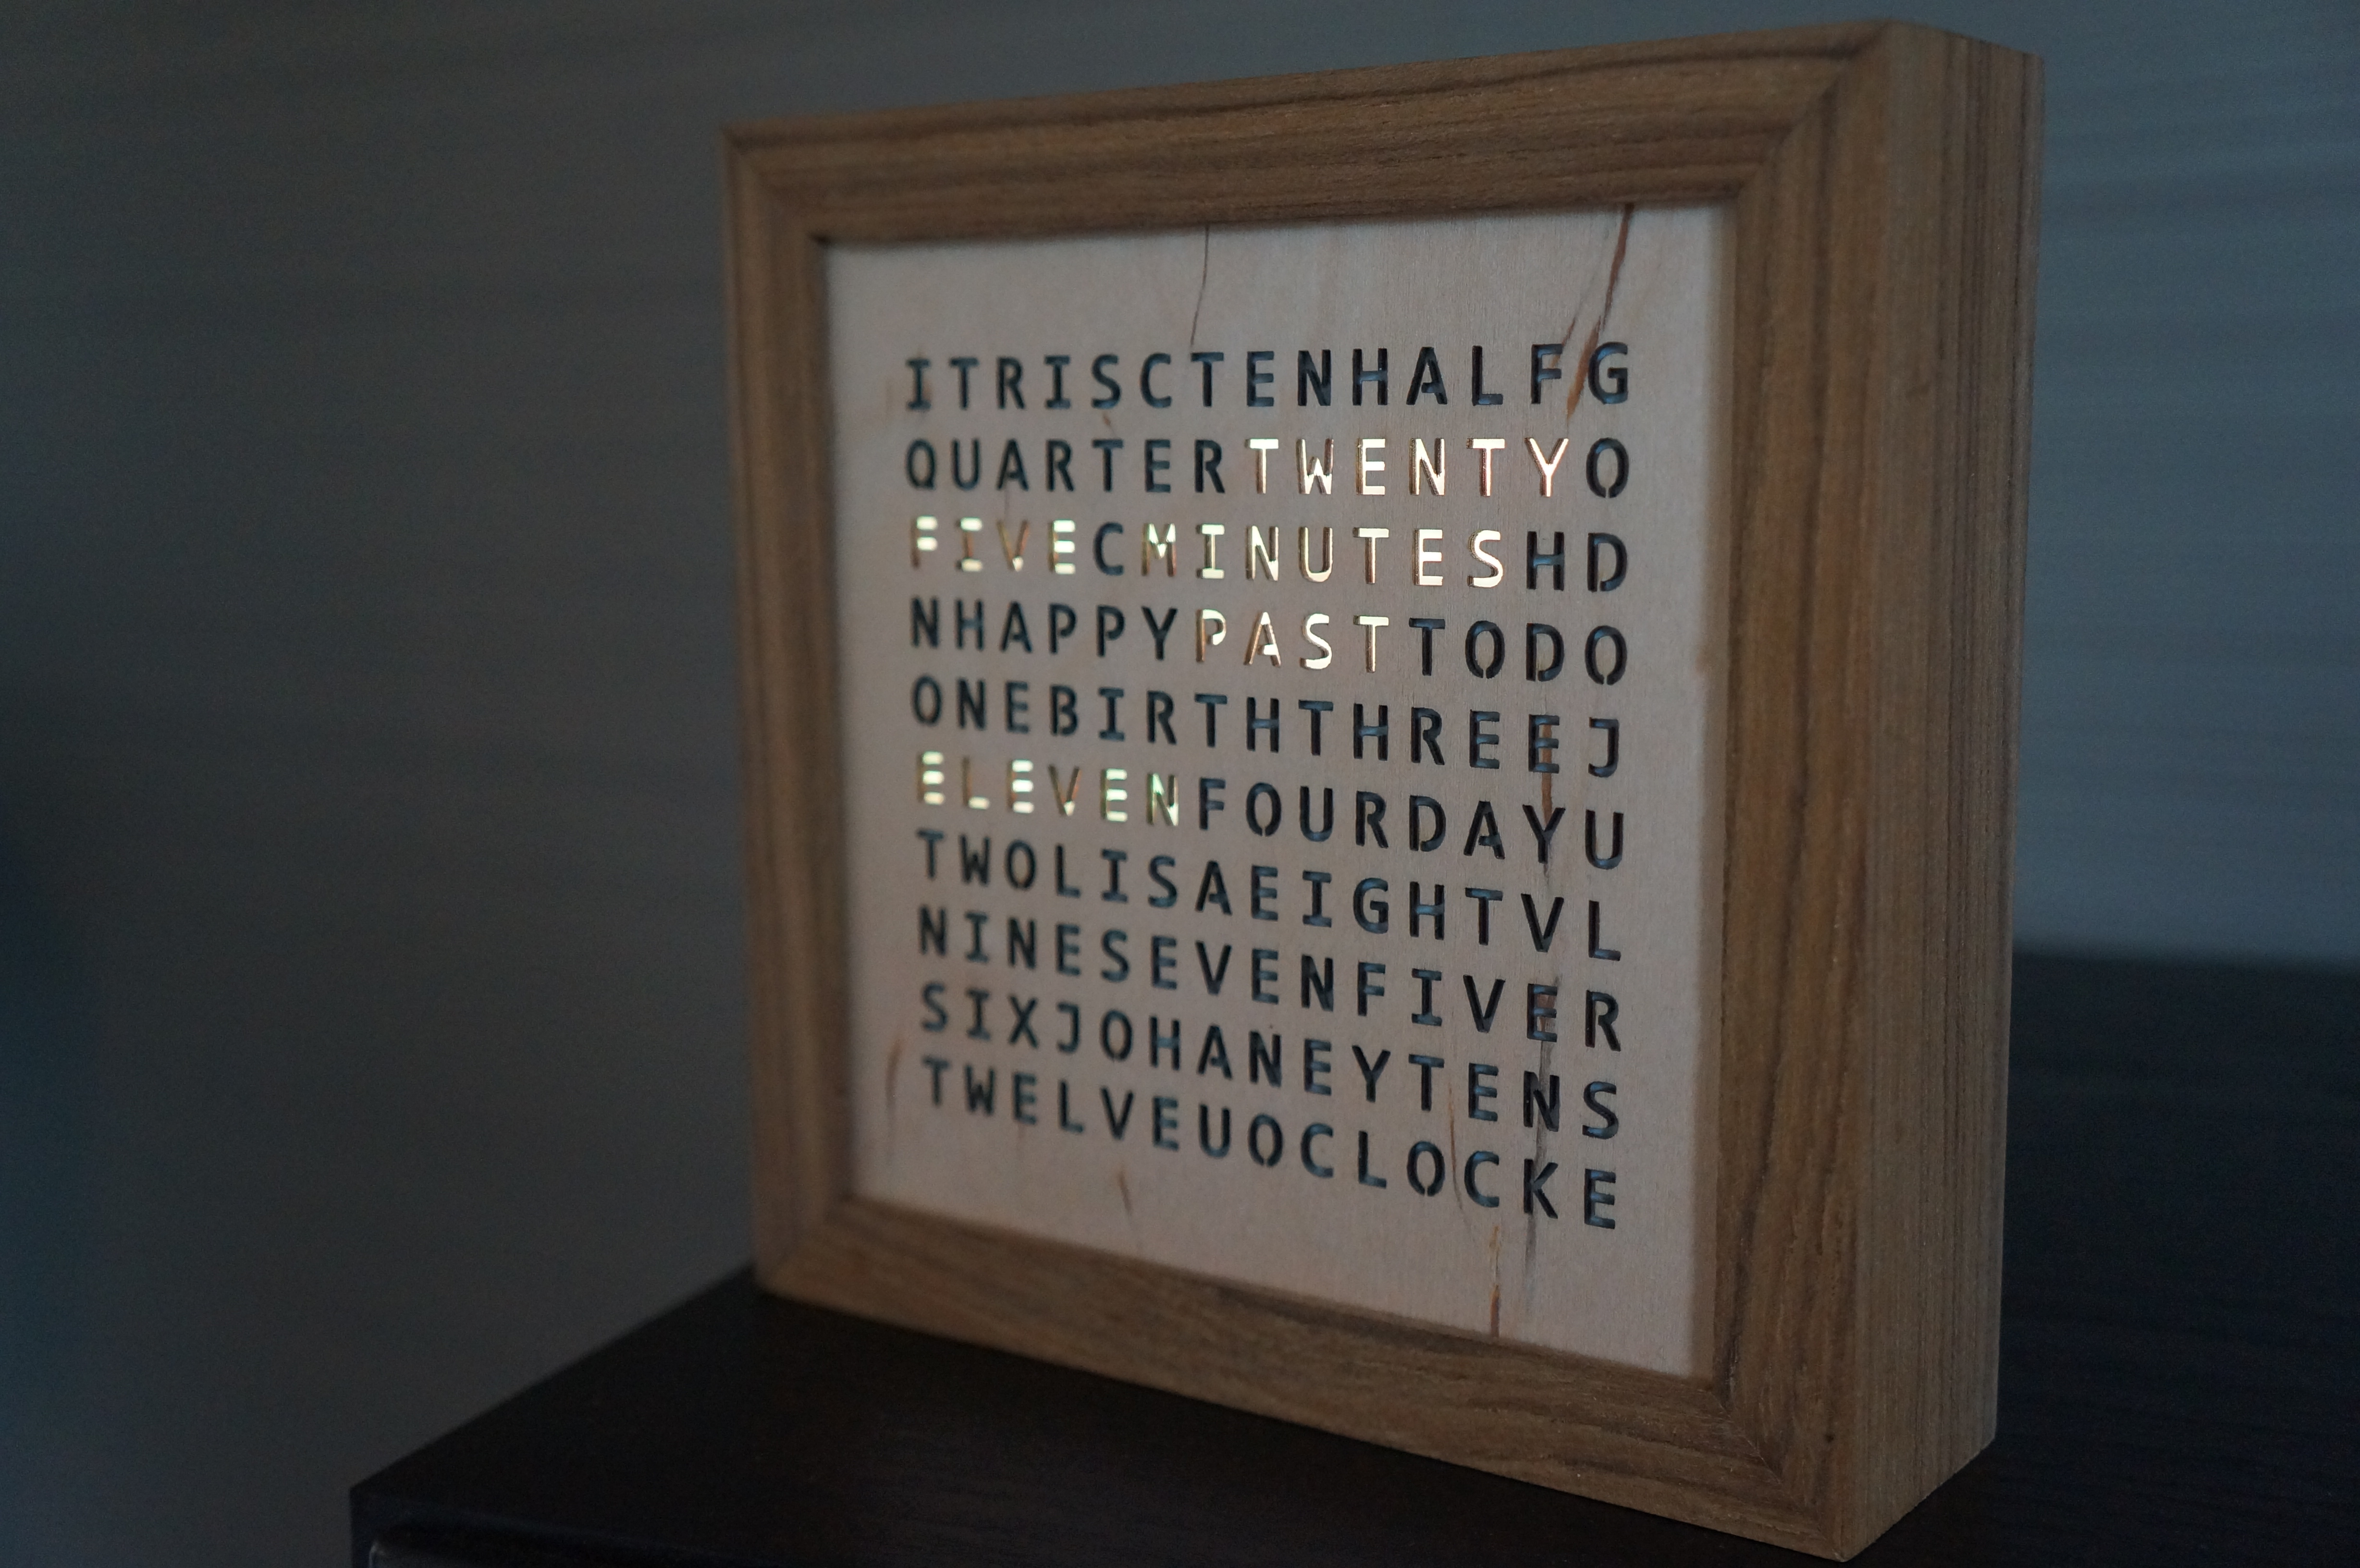
DIY Word Clock
Some time ago i decided to build my own “Word Clock”. If you google “Word Clock”, you will fins probably hundreds of results on word clocks which has been made by other people.
This blog covers my attempt on building one. And I must say that im quite happy with the results:
The hardware consists of:
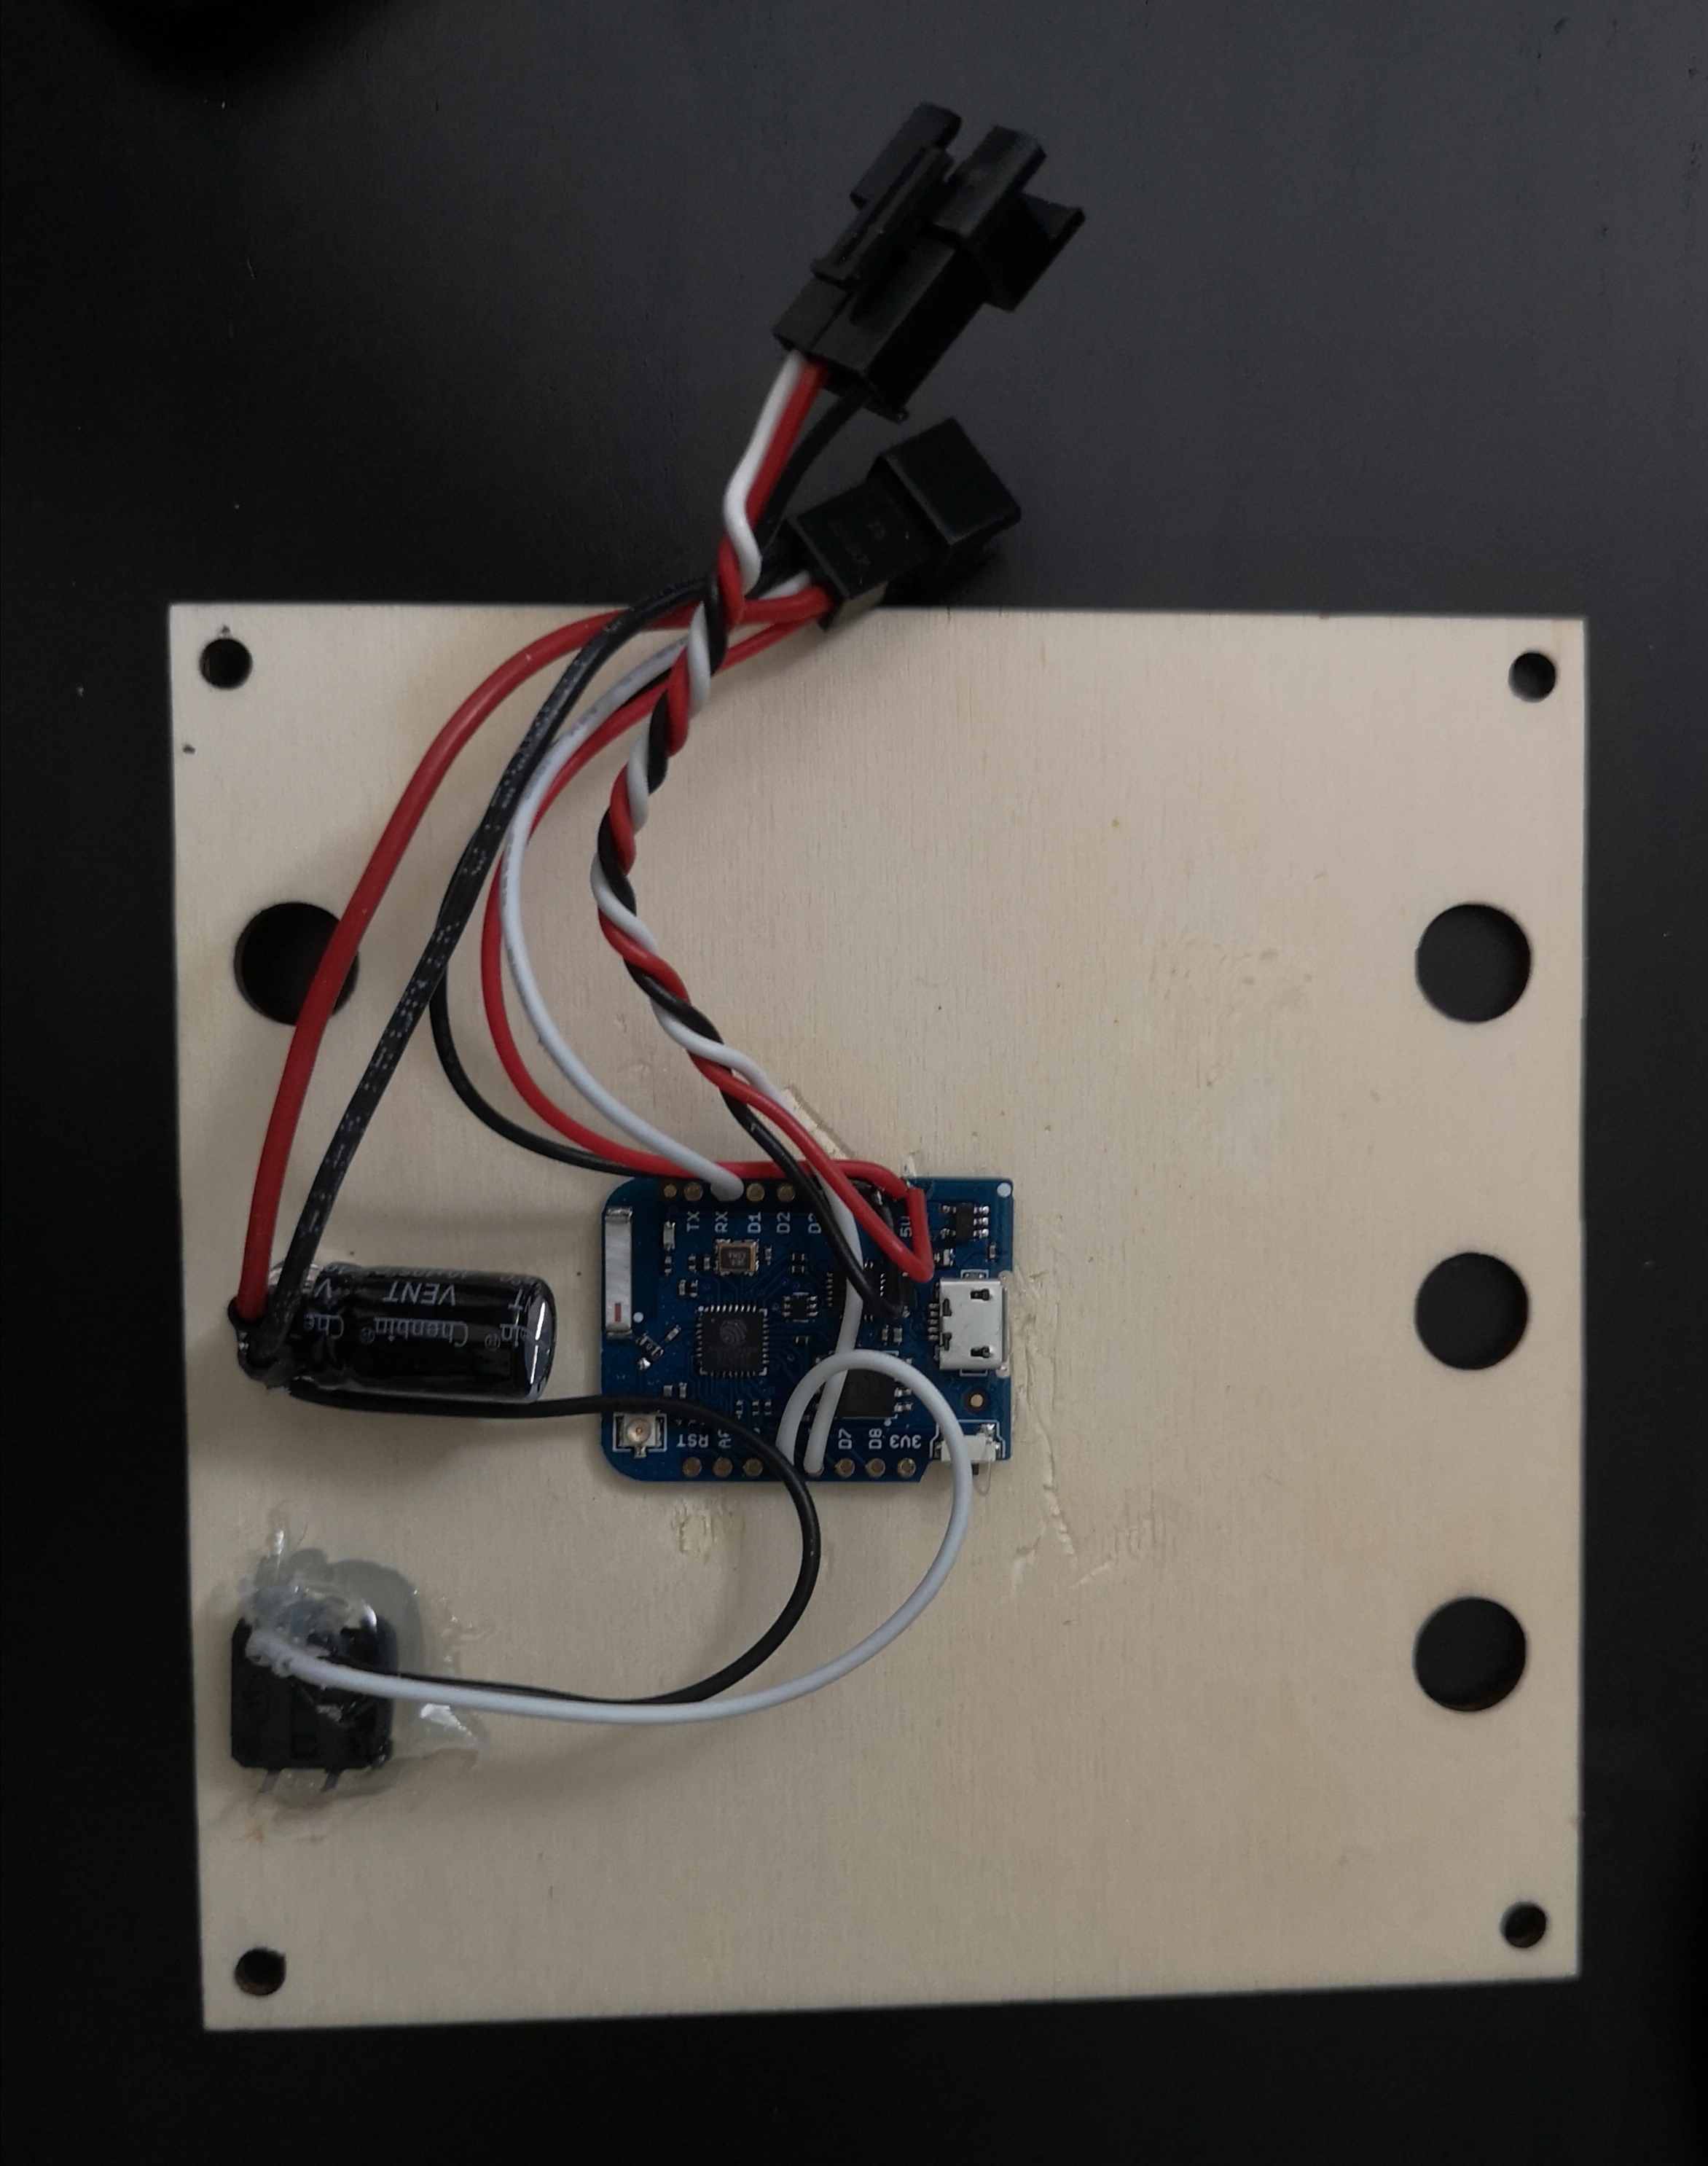
- ESP8266, as the “brain”. WiFi and NTP connected and hosts a web page. The webpage is used to configure time zone, NTP sync frequency, led intensity among other things.
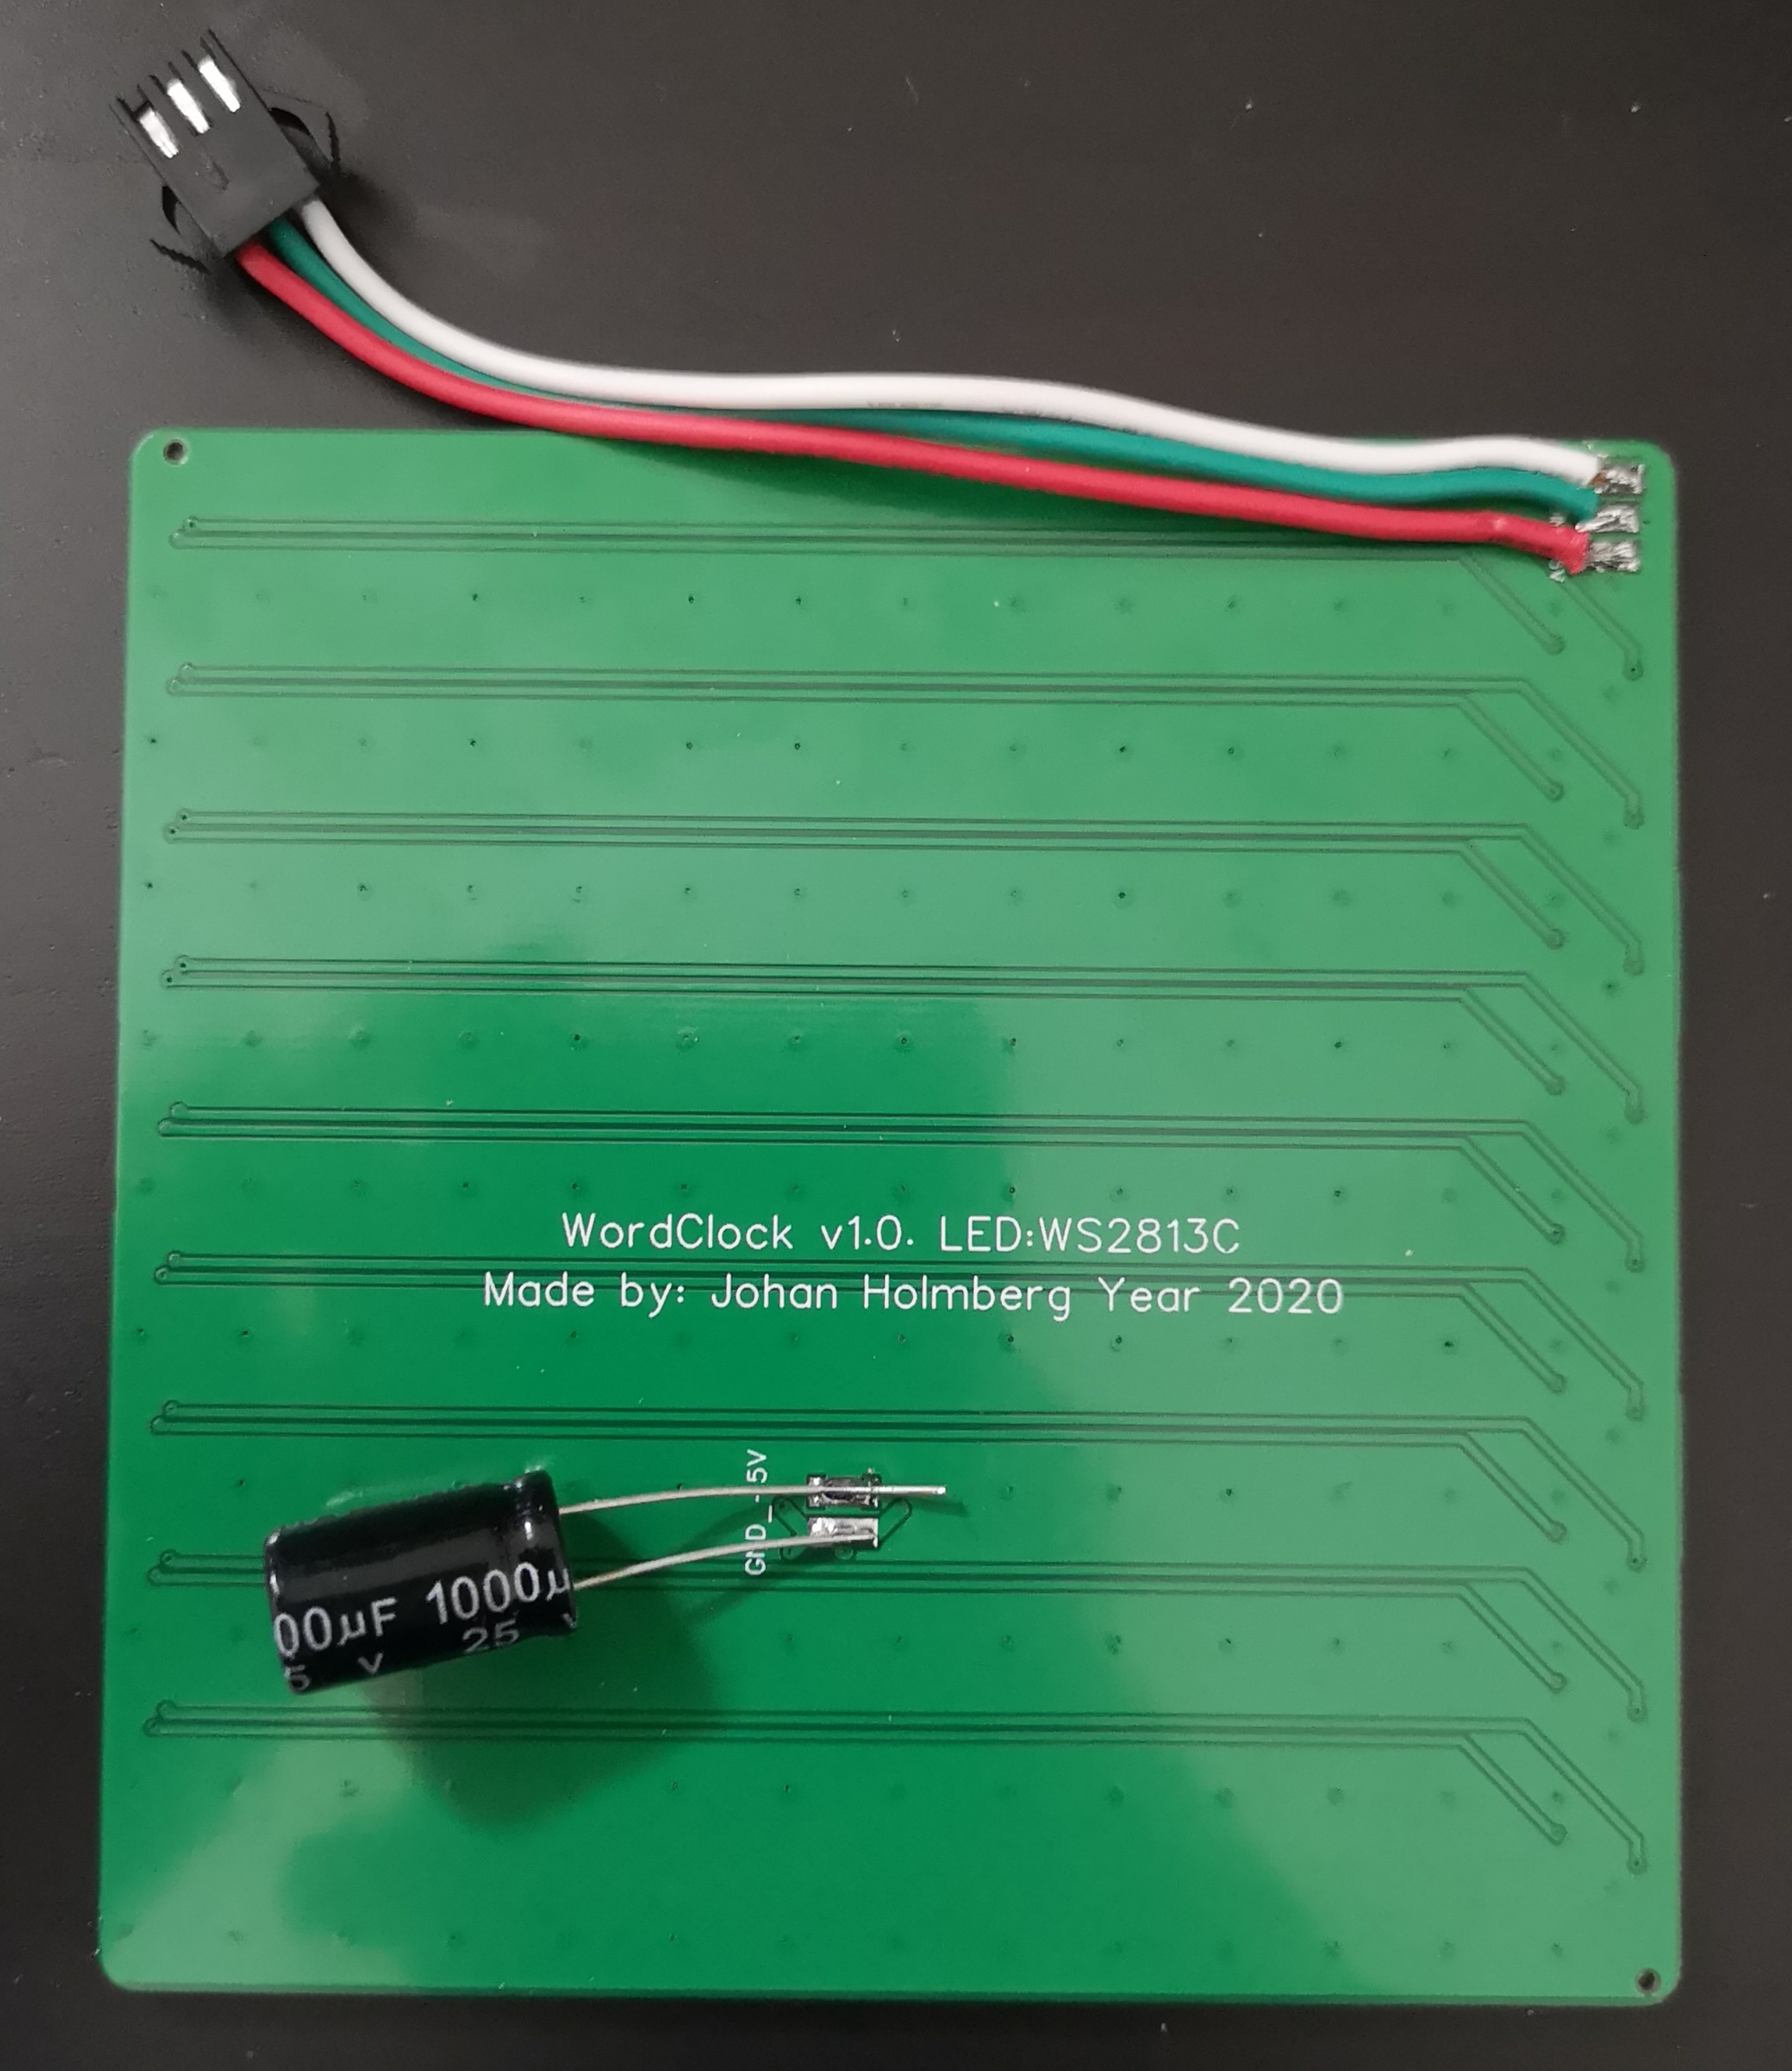
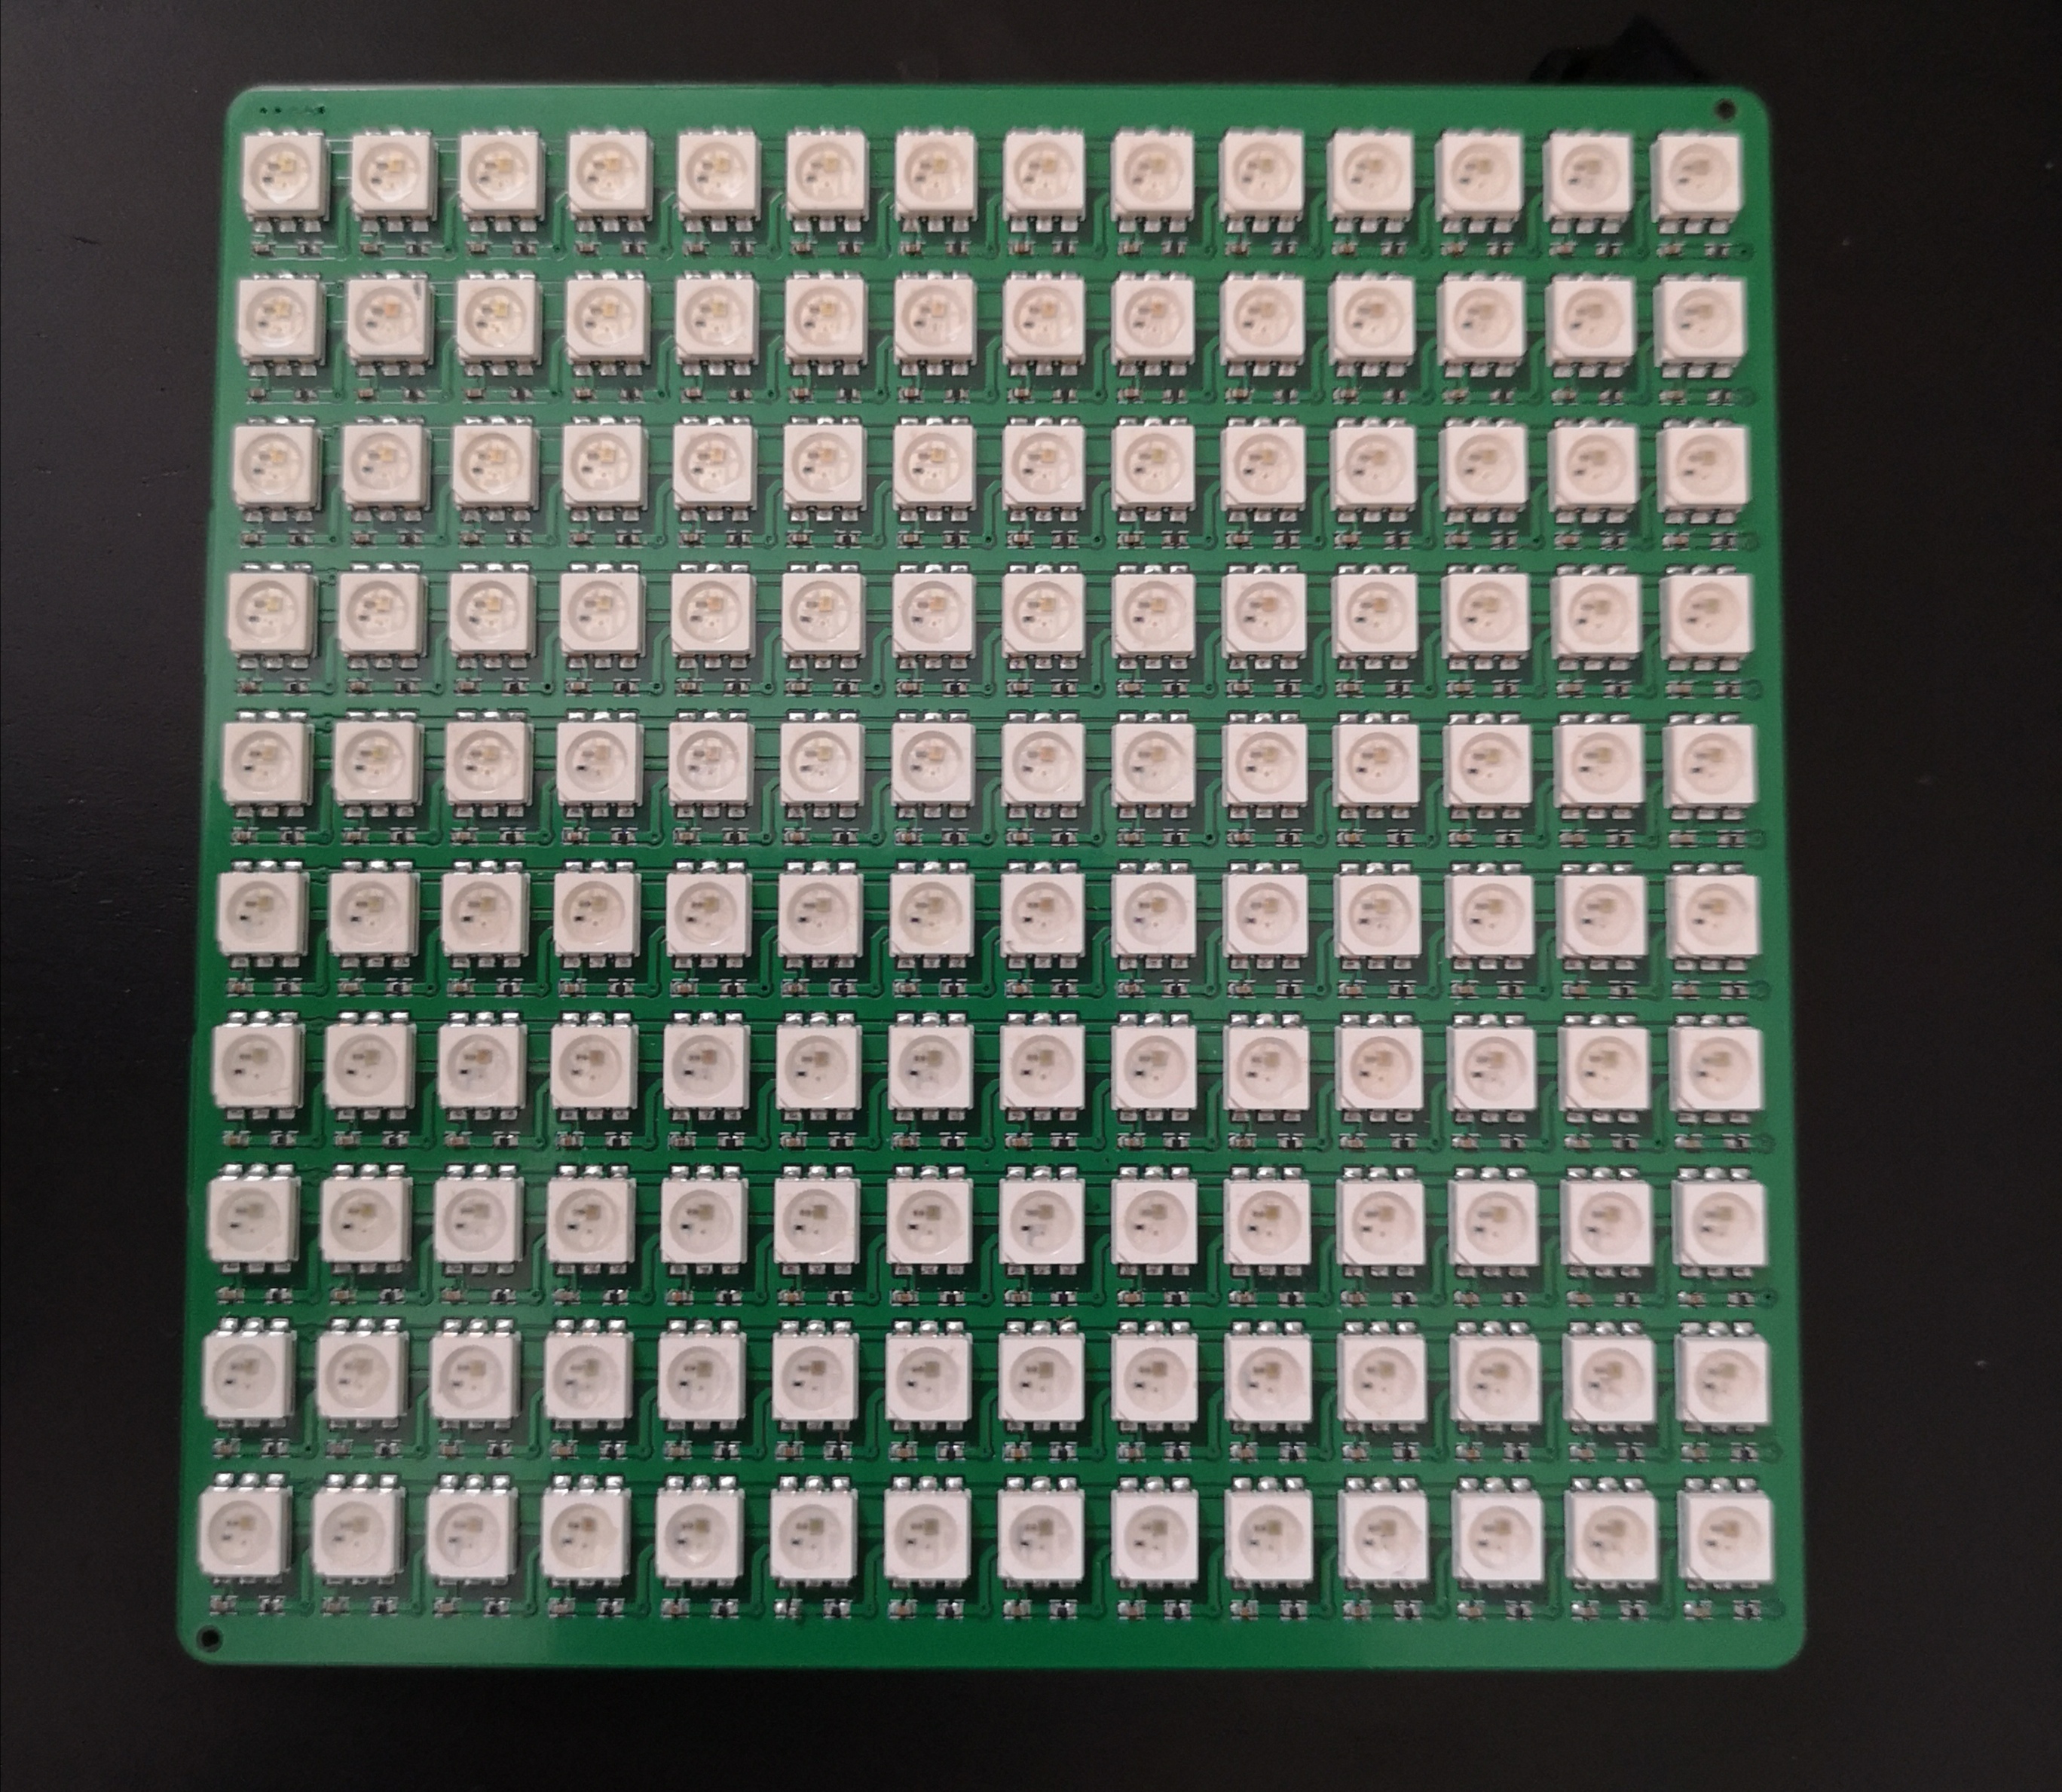
WS2812 LED strip cut to size to form a 14x10 matrix.Custom made WS2813 LED panel (replaced the previous ws2812 strip due to dead led).- Doppler Radar module (RCWL-0516) to detect movements. If movement isn’t detected in a configurable amount of time (thru the web interface) then the LEDs are turned off.
- Radar modules can “see thru” thin objects which makes it possible to mount behind the plywood front and have working results. Compared to PIR sensors that needs an open view.
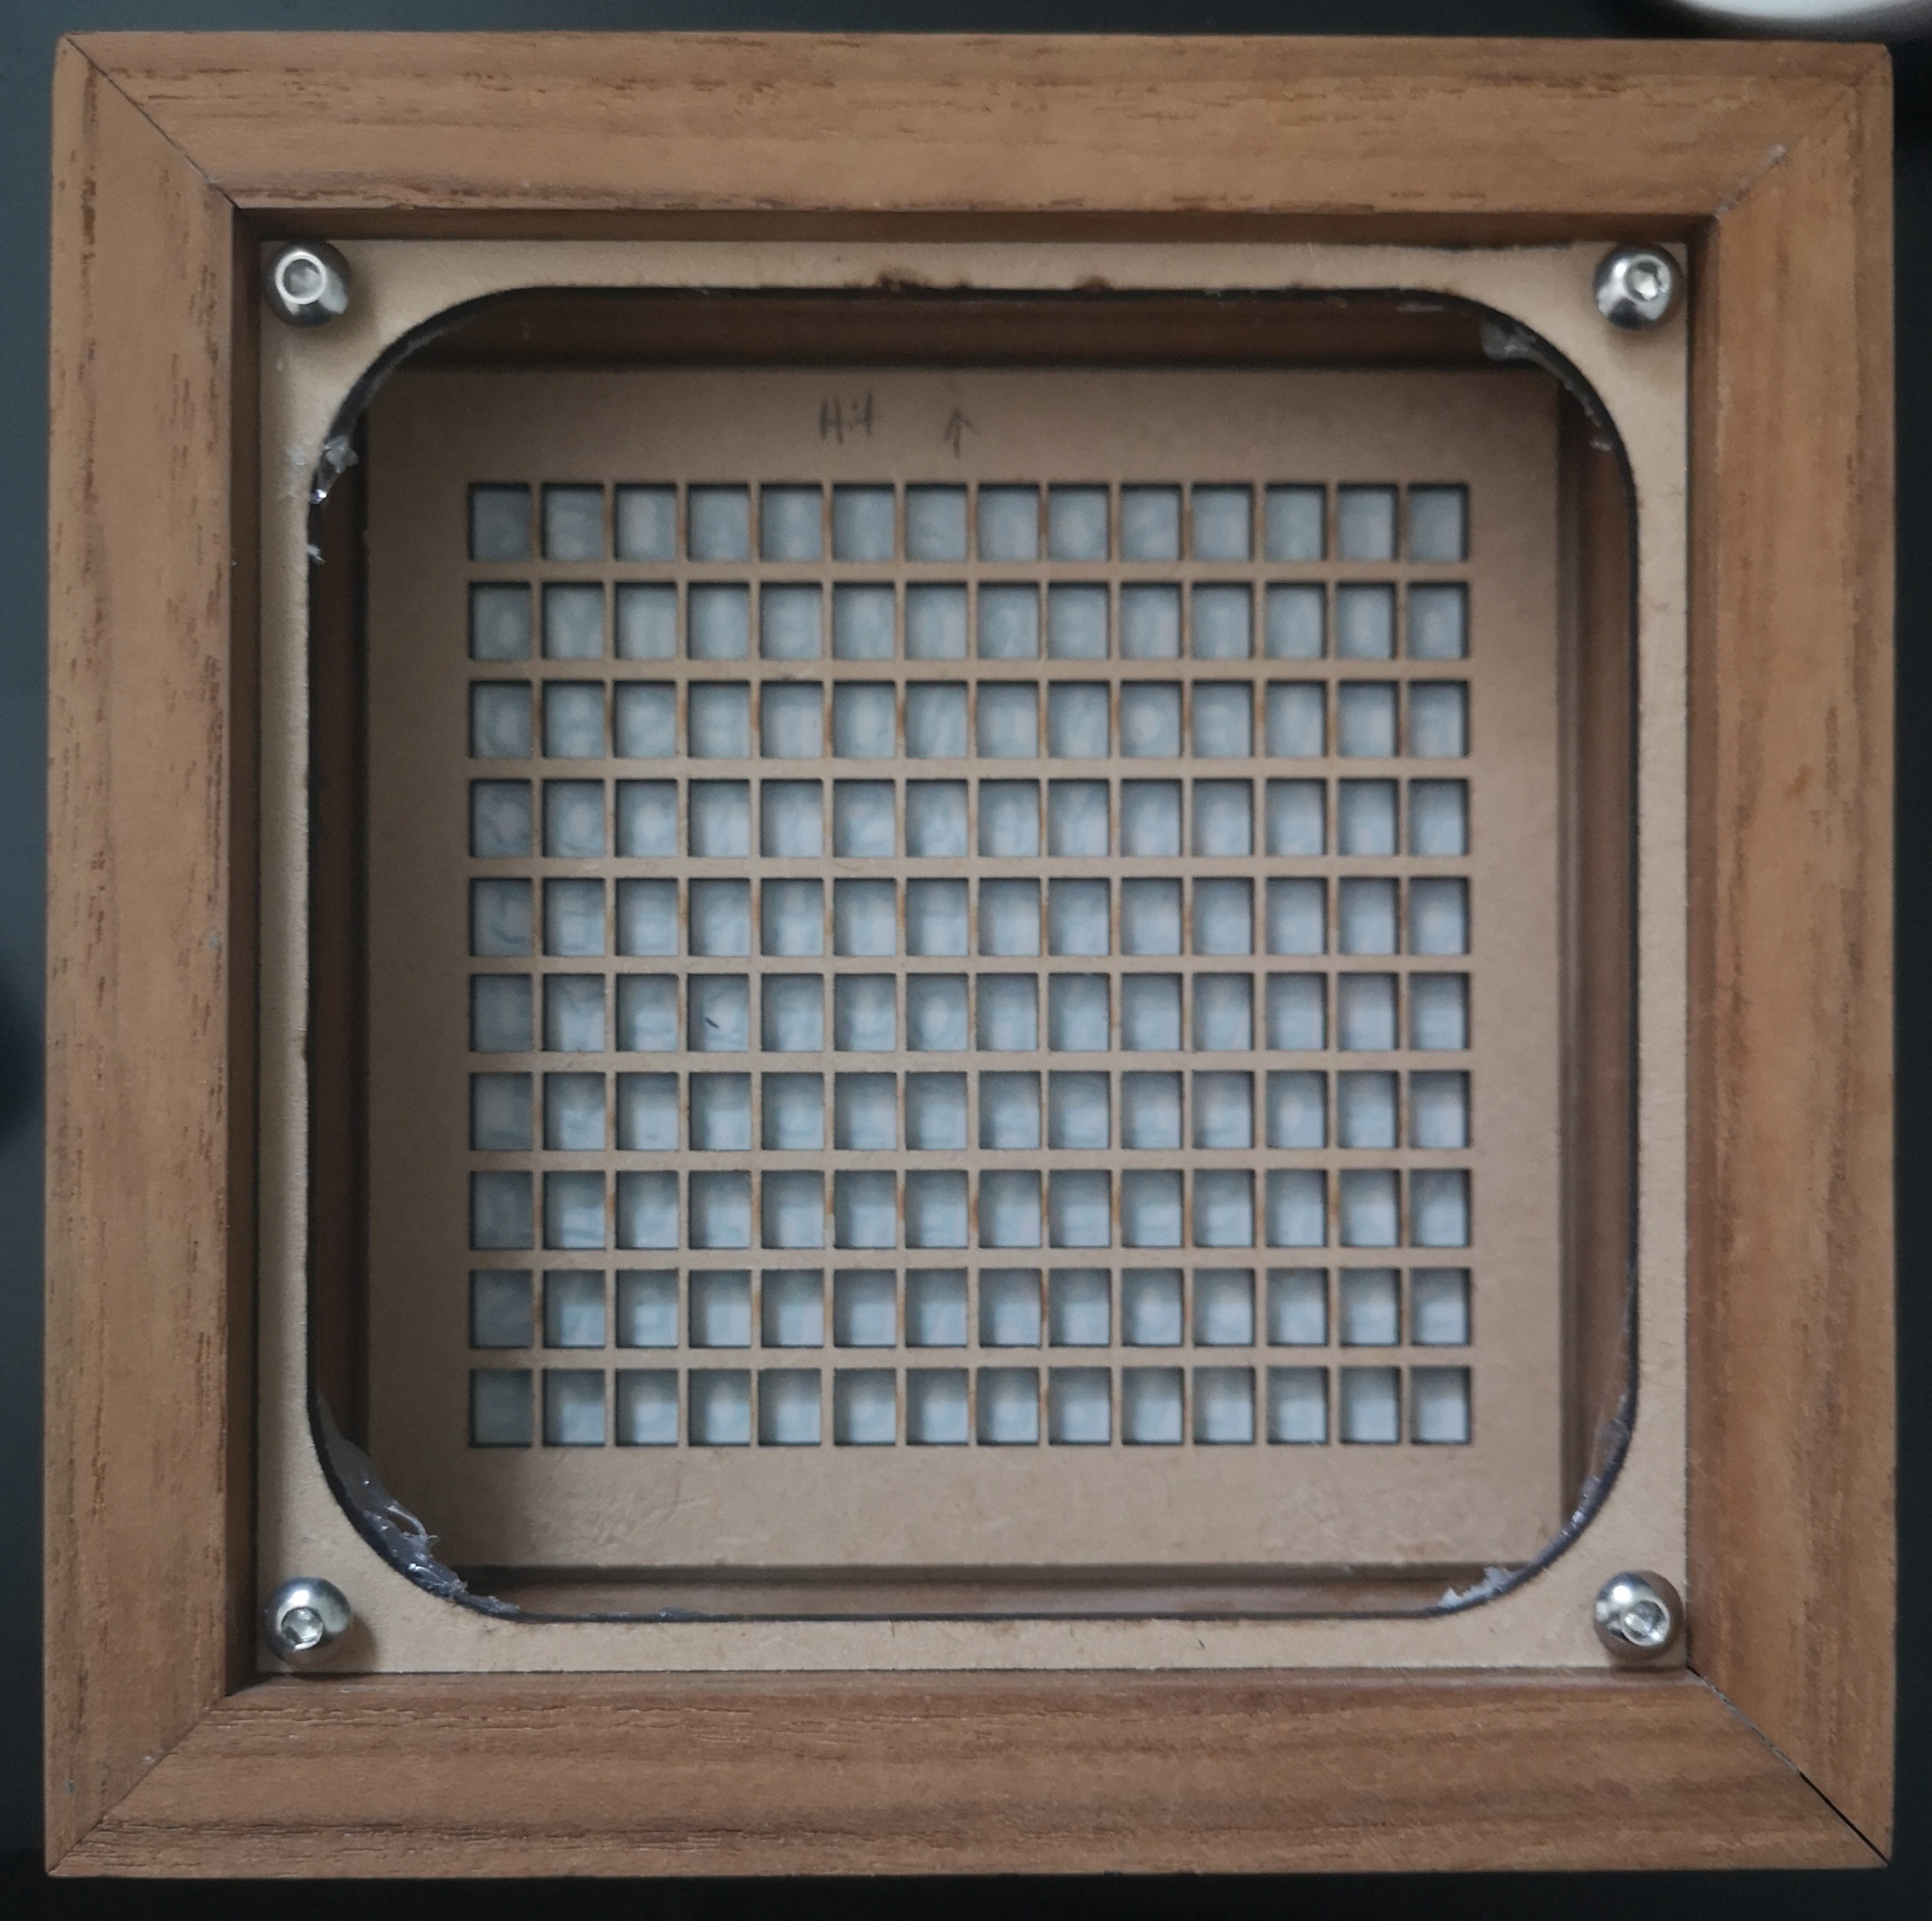
- Laser cut 3mm plywood. A 40w laser was used in my case.
- Mahogany frame. Cut from a bigger piece of wood and made into a frame.
- A white plastic bag used as a light diffuser between the LED and the plywood front. You want this diffuser to be as thin as possible so that there isn’t any light traveling/reflecting to other characters thru the diffuser itself.
- A custom/modified stencil font family was created by me. A stencil font is required since parts of the letters otherwise will be lost during the laser cutting process.
The size of the led matrix is around 9x9cm which makes each individual letter very small - around 6 mm tall and 5 mm wide.
You might be able to cut the plywood with a CNC router with a really tiny end-mill, but the forces from the end mill might damage the tiny parts of the letters.
Tools/knowledge needed:
- A laser cutter (or possibly ordering custom made laser cut parts from internet).
- Basic woodworking tools and some wood glue.
- Basic knowledge about flashing Arduino code onto a ESP8266.
- Basic soldering skills.
Cost:
- Laser cut plywood.
- Cheap if you own a laser cutter.
- Price unknown if you need someone to laser cut it for you.
- LED Board
- I had mine fabricated thru JLCPCB which also does assembly. The PCB with 140 WS2813, 140 capacitors and 140 resistors soldered onto it was about 17 USD plus shipping for a finished product.
- ESP8266.
- I used a Wemos Mini pro since that was what I had in stock. Costs around 10 USD
- Radar sensor.
- Around 2 USD
- Mahogany.
- Expensive, at least here in sweden. For me it was round 50 USD
Images:
Arduino code and schematics can be found in my Github