Parking solution based on Axis LPV and ThingsBoard
Let’s build a camera based parking solution!
Introduction
In previous blogs, I have shown how Axis cameras and their people counting capabilities can be used along with ThingsBoard to build a complete people counting analytics solution.
In this blog we will instead work with Axis and their License Plate Verifier capabilities and build a solution in ThingsBoard which will display number of used/free parking spaces based on the license plate readings that the Axis camera provides.
ThingsBoard is usually considered as an IoT platform, and in this scenario we will use the Axis camera as a IoT Device which sends its license plate readings in JSON format, and each vehicle that should be counted by the system will be considered as an Asset in ThingsBoard.
In ThingsBoard we will utilize assets for the parking garage as well as for each car/license plate and create a relation between the parking garage and each car which should be “counted” in the corresponding garage. Relations make it possible for us to have multiple garages/parking spaces while reusing the same car asset by declaring creating more “garage” assets and linking the existing cars with a relation to the additional garage.
This solution is based on the following pre-reqs:
- We have been given 5 parking spaces in a shared parking garage which in total holds 100+ parking spaces.
- The garage only has one entrance/exit so we will only use one camera. However, the solution support multiple cameras if more than one entrance/exit exists.
- We know the registration numbers for all our company cars for which we should count against our pool of 5 parking spaces.
- We will only count our cars, and not any of the other cars passing thru the entrance/exit of the garage.
Axis LPV - Payload
The Axis LPV ACAP (software running in the camera) is configured to send its data as events to a HTTPS endpoint. In this case, the HTTPS endpoint is provided by a Integration in ThingsBoard Professional edition.
The payload that the camera sends to the HTTPS endpoint is:
{
  "packetCounter":"11890300",
  "capture_timestamp":"1623405938252",
  "frame_timestamp":"0",
  "capture_ts":"1623405938252000000",
  "datetime":"20210611 130538252",
  "plateText":"\u0052\u004c\u0045\u0031\u0031\u0036\u0038\u0034",
  "plateUnicode":"\u0052\u004c\u0045\u0031\u0031\u0036\u0038\u0034",
  "plateUTF8":"ABC001",
  "plateASCII":"ABC001",
  "plateCountry":"SWE",
  "plateConfidence":"0.719034",
  "carState":"lost",
  "roiID":"2",
  "geotag":{
    "lat": 50.418114,
    "lon": 30.476213
  },
  "imageType": "plate",
  "plateImageType": "jpg",
  "plateImageSize": "0",
  "carMoveDirection":"out",
  "timeProcessing":"0",
  "plateCoordinates":[1185, 532, 140, 28],
  "plateCoordinatesRelative":[1030, 196, 140, 28],
  "carID":"1144696",
  "GEOtarget":"Camera",
  "imagesURI":[
    "/local/fflprapp/tools.cgi?action=getImage&name=45/20210611130538_785523lp_RLE11684_11890182.jpg",
    "/local/fflprapp/tools.cgi?action=getImage&name=44/20210611130538_547764roi_RLE11684_11890181.jpg"
  ],
  "imageFile":"/var/spool/storage/SD_DISK/fflprapp/images/44/20210611130538_547764roi_RLE11684_11890181.jpg",
  "camera_info":{
    "SerialNumber":"ACCC8ED3290D",
    "ProdShortName":"AXIS P1445-LE-3",
    "MACAddress":"AC:CC:8E:D3:29:0D"
  },
  "sensorProviderID":"defaultID_176"
}
From the payload above, we will use:
- The “plateUTF8” is the registration number of the vehicle.
- The “carMoveDirection” indicates if the vehicle is traveling towards the camera (in), away from the camera (out).
Every time the Axis camera detect a license plate, then it will send its payload to the configured HTTPS endpoint.
ThingsBoard configuration
ThingsBoard is the platform in which we will receive the “events” from the camera. ThingsBoard will also provide the “intelligence” needed to calculate the number of used/free spaces for the parking garage based on the camera input.
For this we need the following:
- An integration which provides the HTTPS endpoint to which the Axis camera can send its payload.
- A data converter which takes the relevant information from the Axis payload and output it to the corresponding vehicle Asset.
- A rule chain which will run every XX seconds and calculate the number of used/free spaces based on the relations between each vehicle asset and the parking garage.
- Administrative dashboard which shows statistics as well as providing a interface of changing the in/out state of a specific vehicle if a situation where a camera has performed an unsuccessful reading.
- Public dashboard which is intended to show the number of free parking spaces without requiring login.
Integration
A HTTP integration is created which automatically generates a URL which we enter into the Axis camera.
Important here is that we do not want the integration to automatically create device/assets, since we want to control which vehicles we have manually:
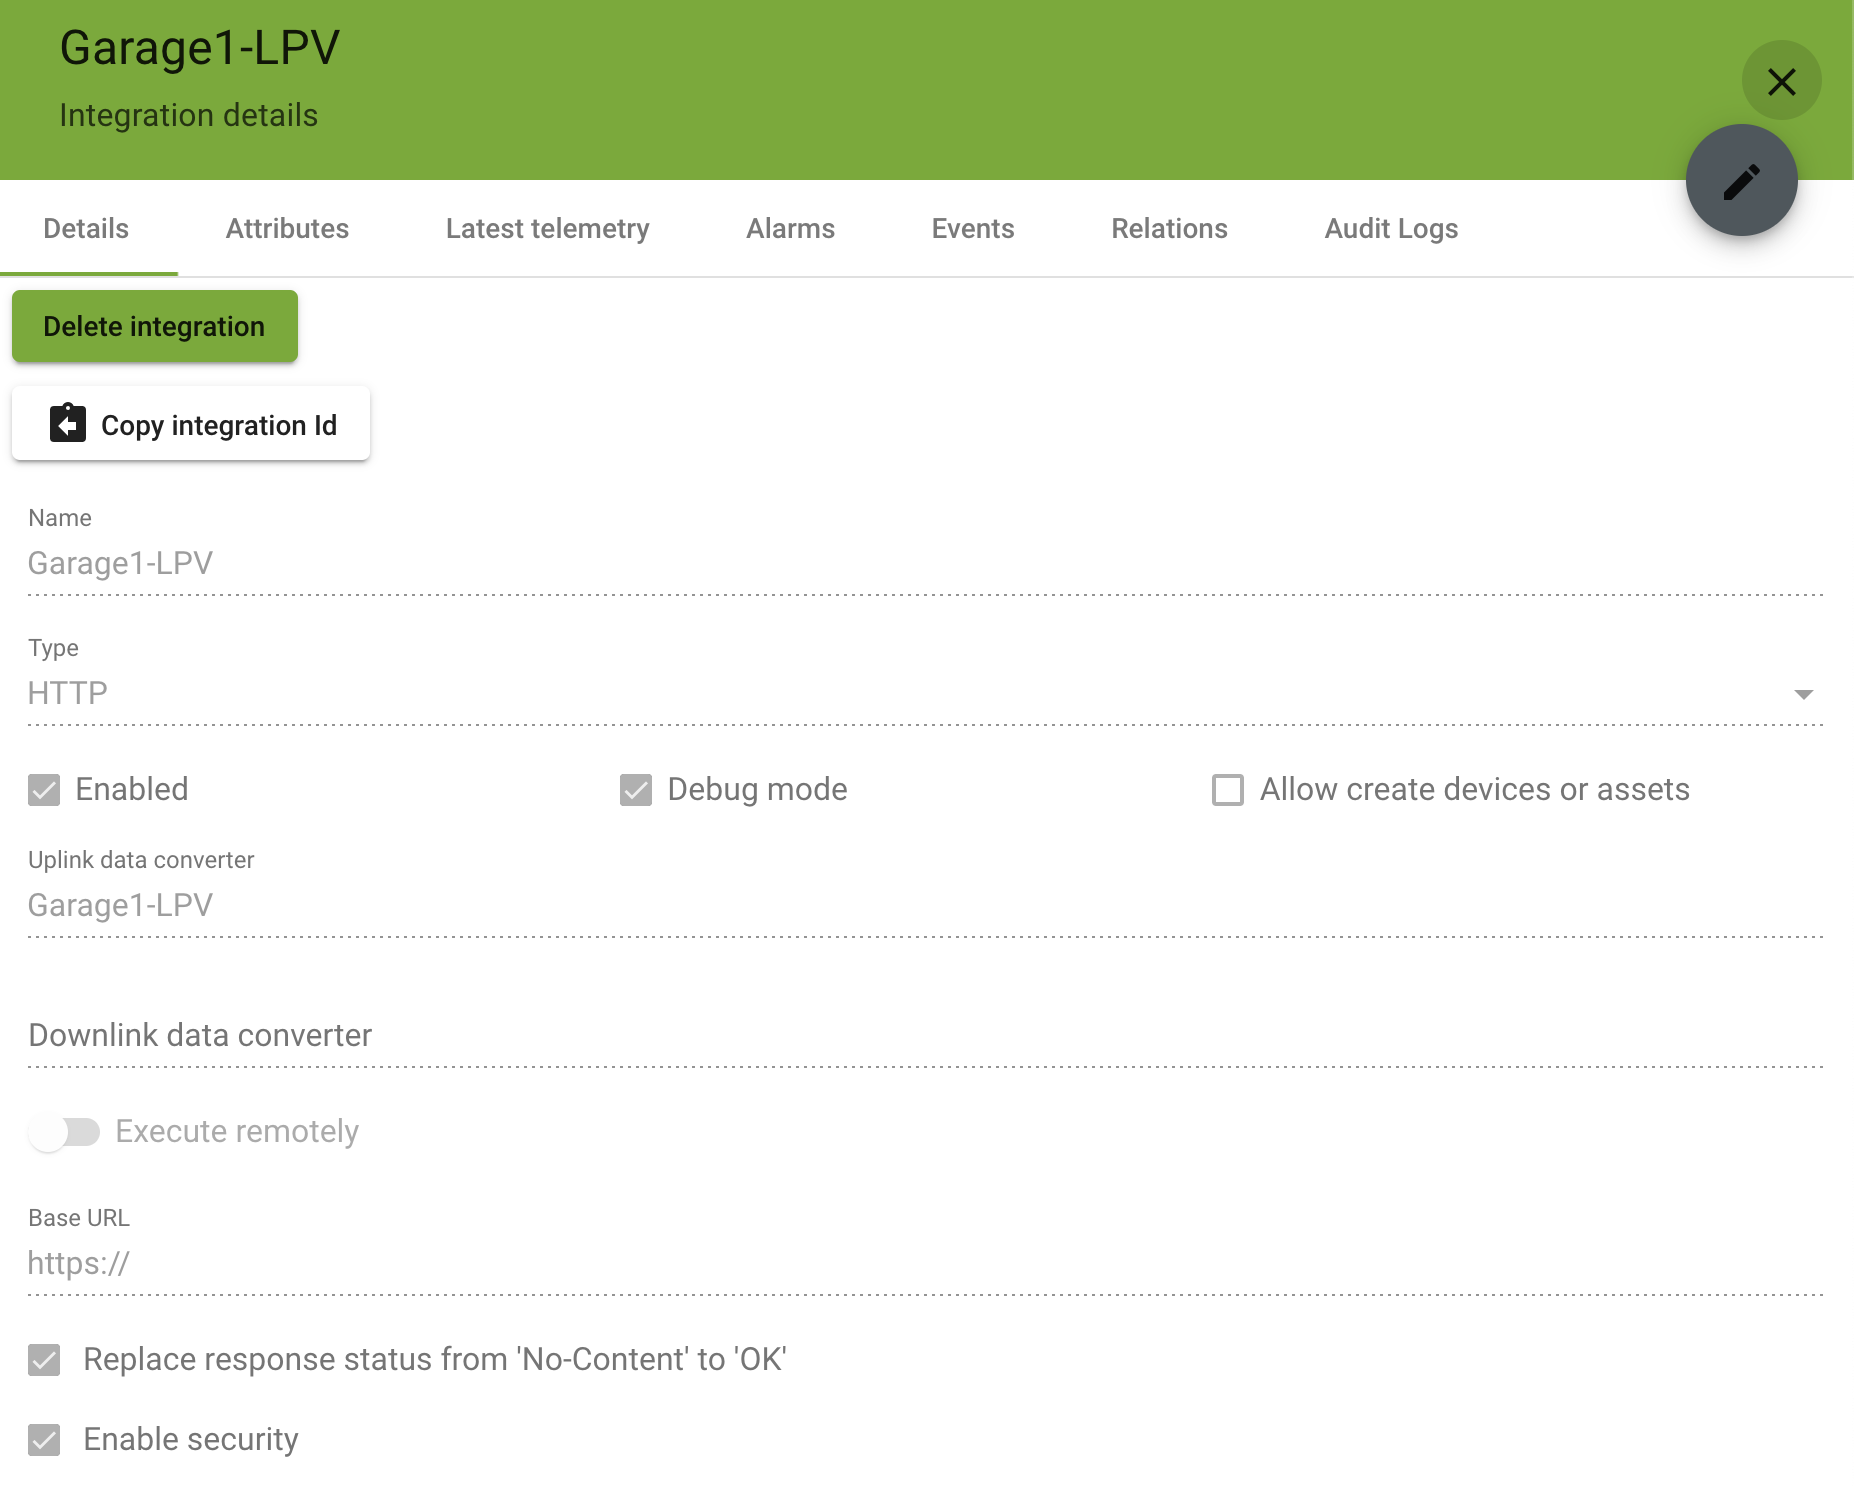
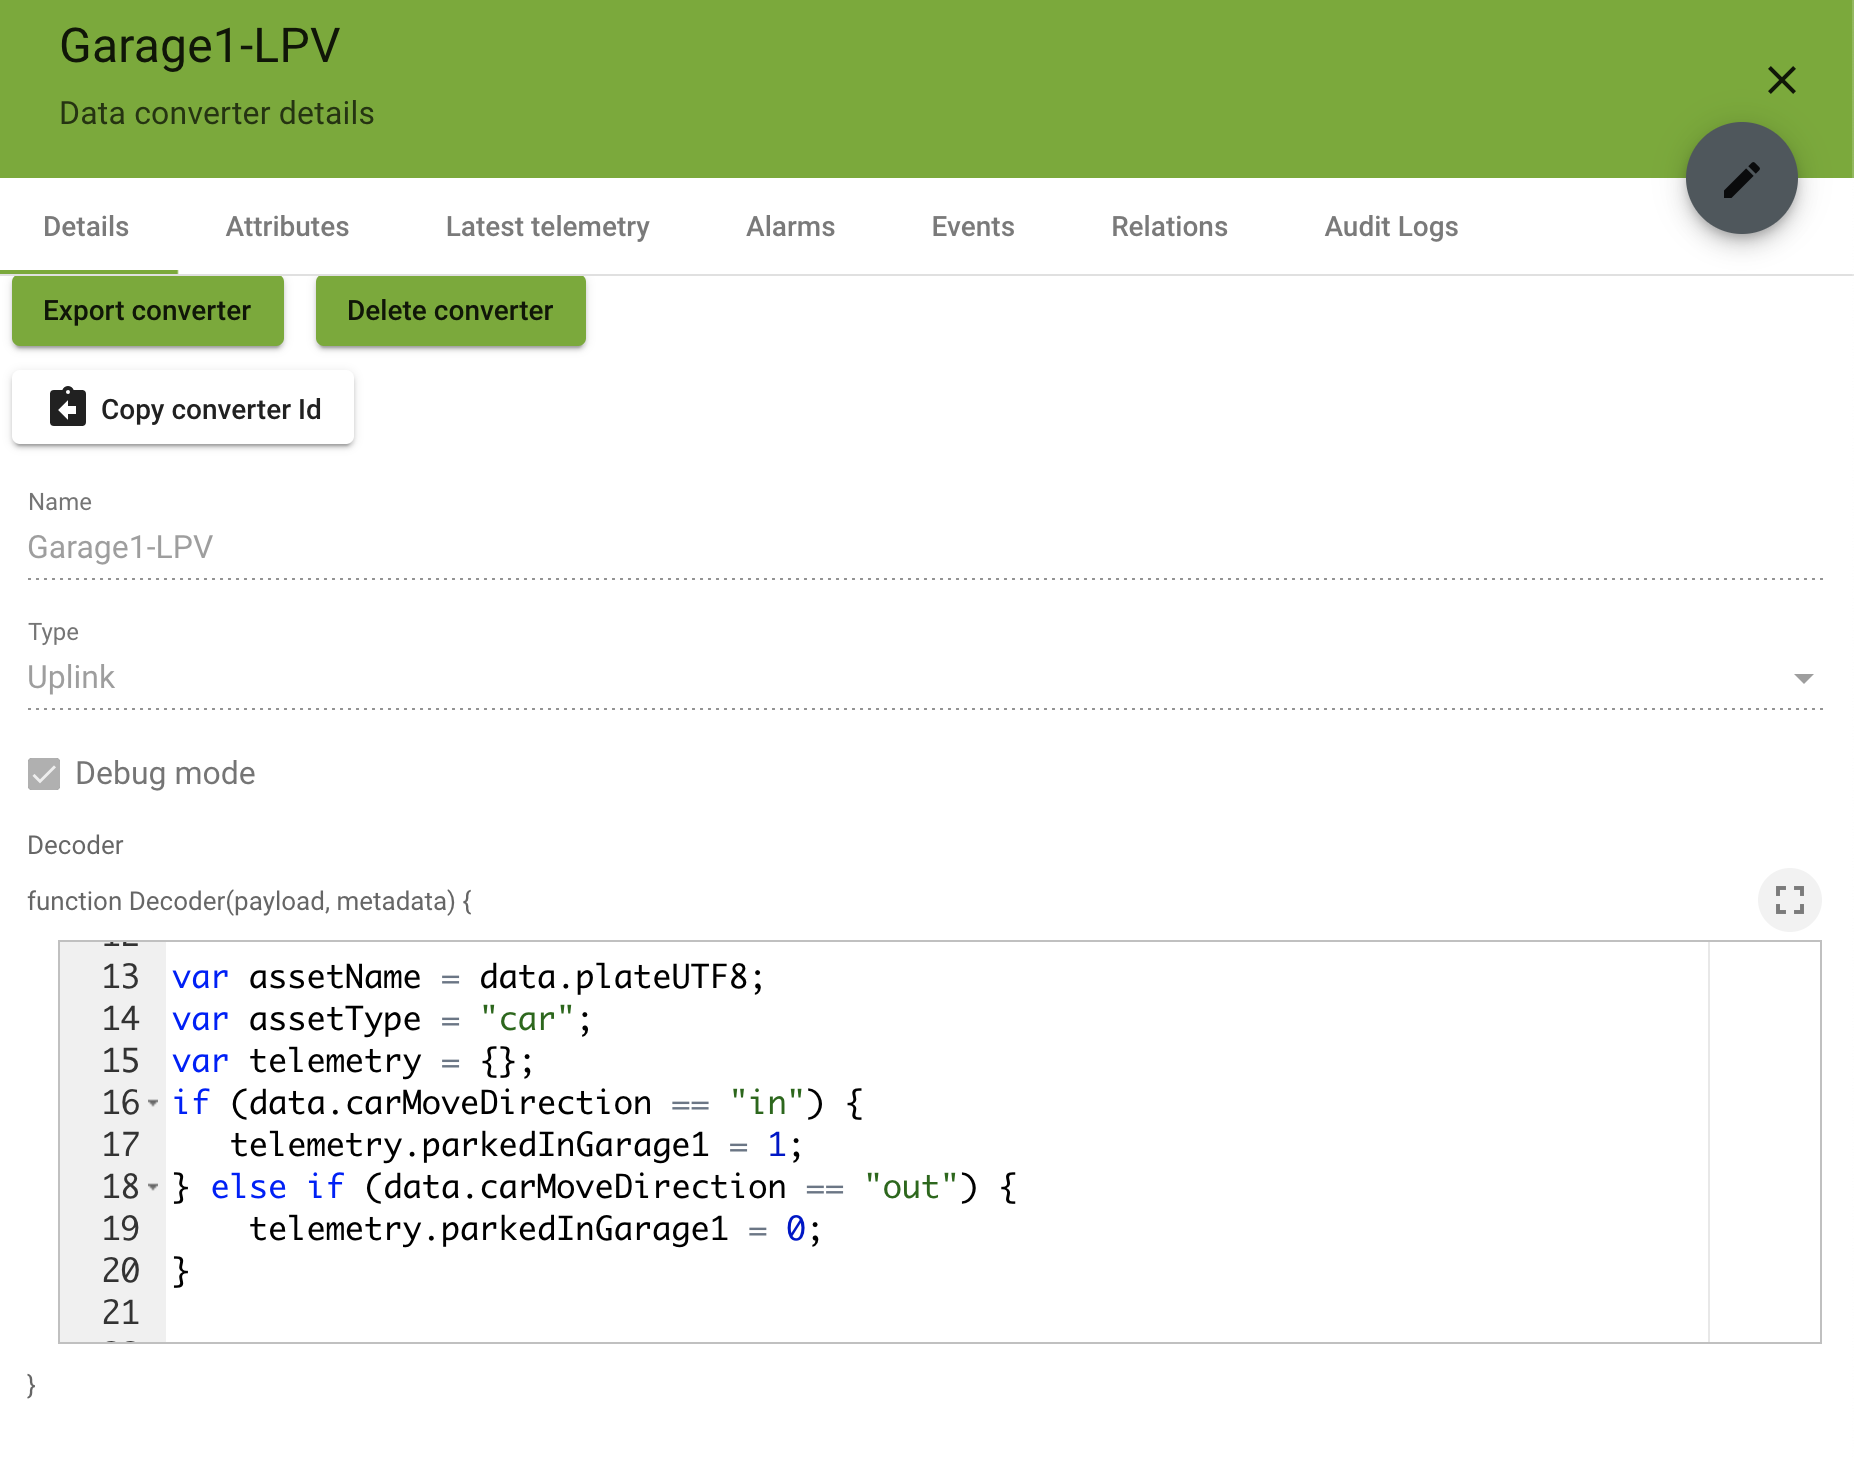
Data converter
In our data converter, we capture the things which are important for us. The “plateUTF8” holds the license plate reading and the “carMoveDirection” gives us the information if the vehicle enters or exits the garage.
Note that we have defined “assetName” and “assetType” instead of “deviceName” and “deviceType”. The reason for this is that we want ThingsBoard to put the data onto the vehicle asset instead of a device.
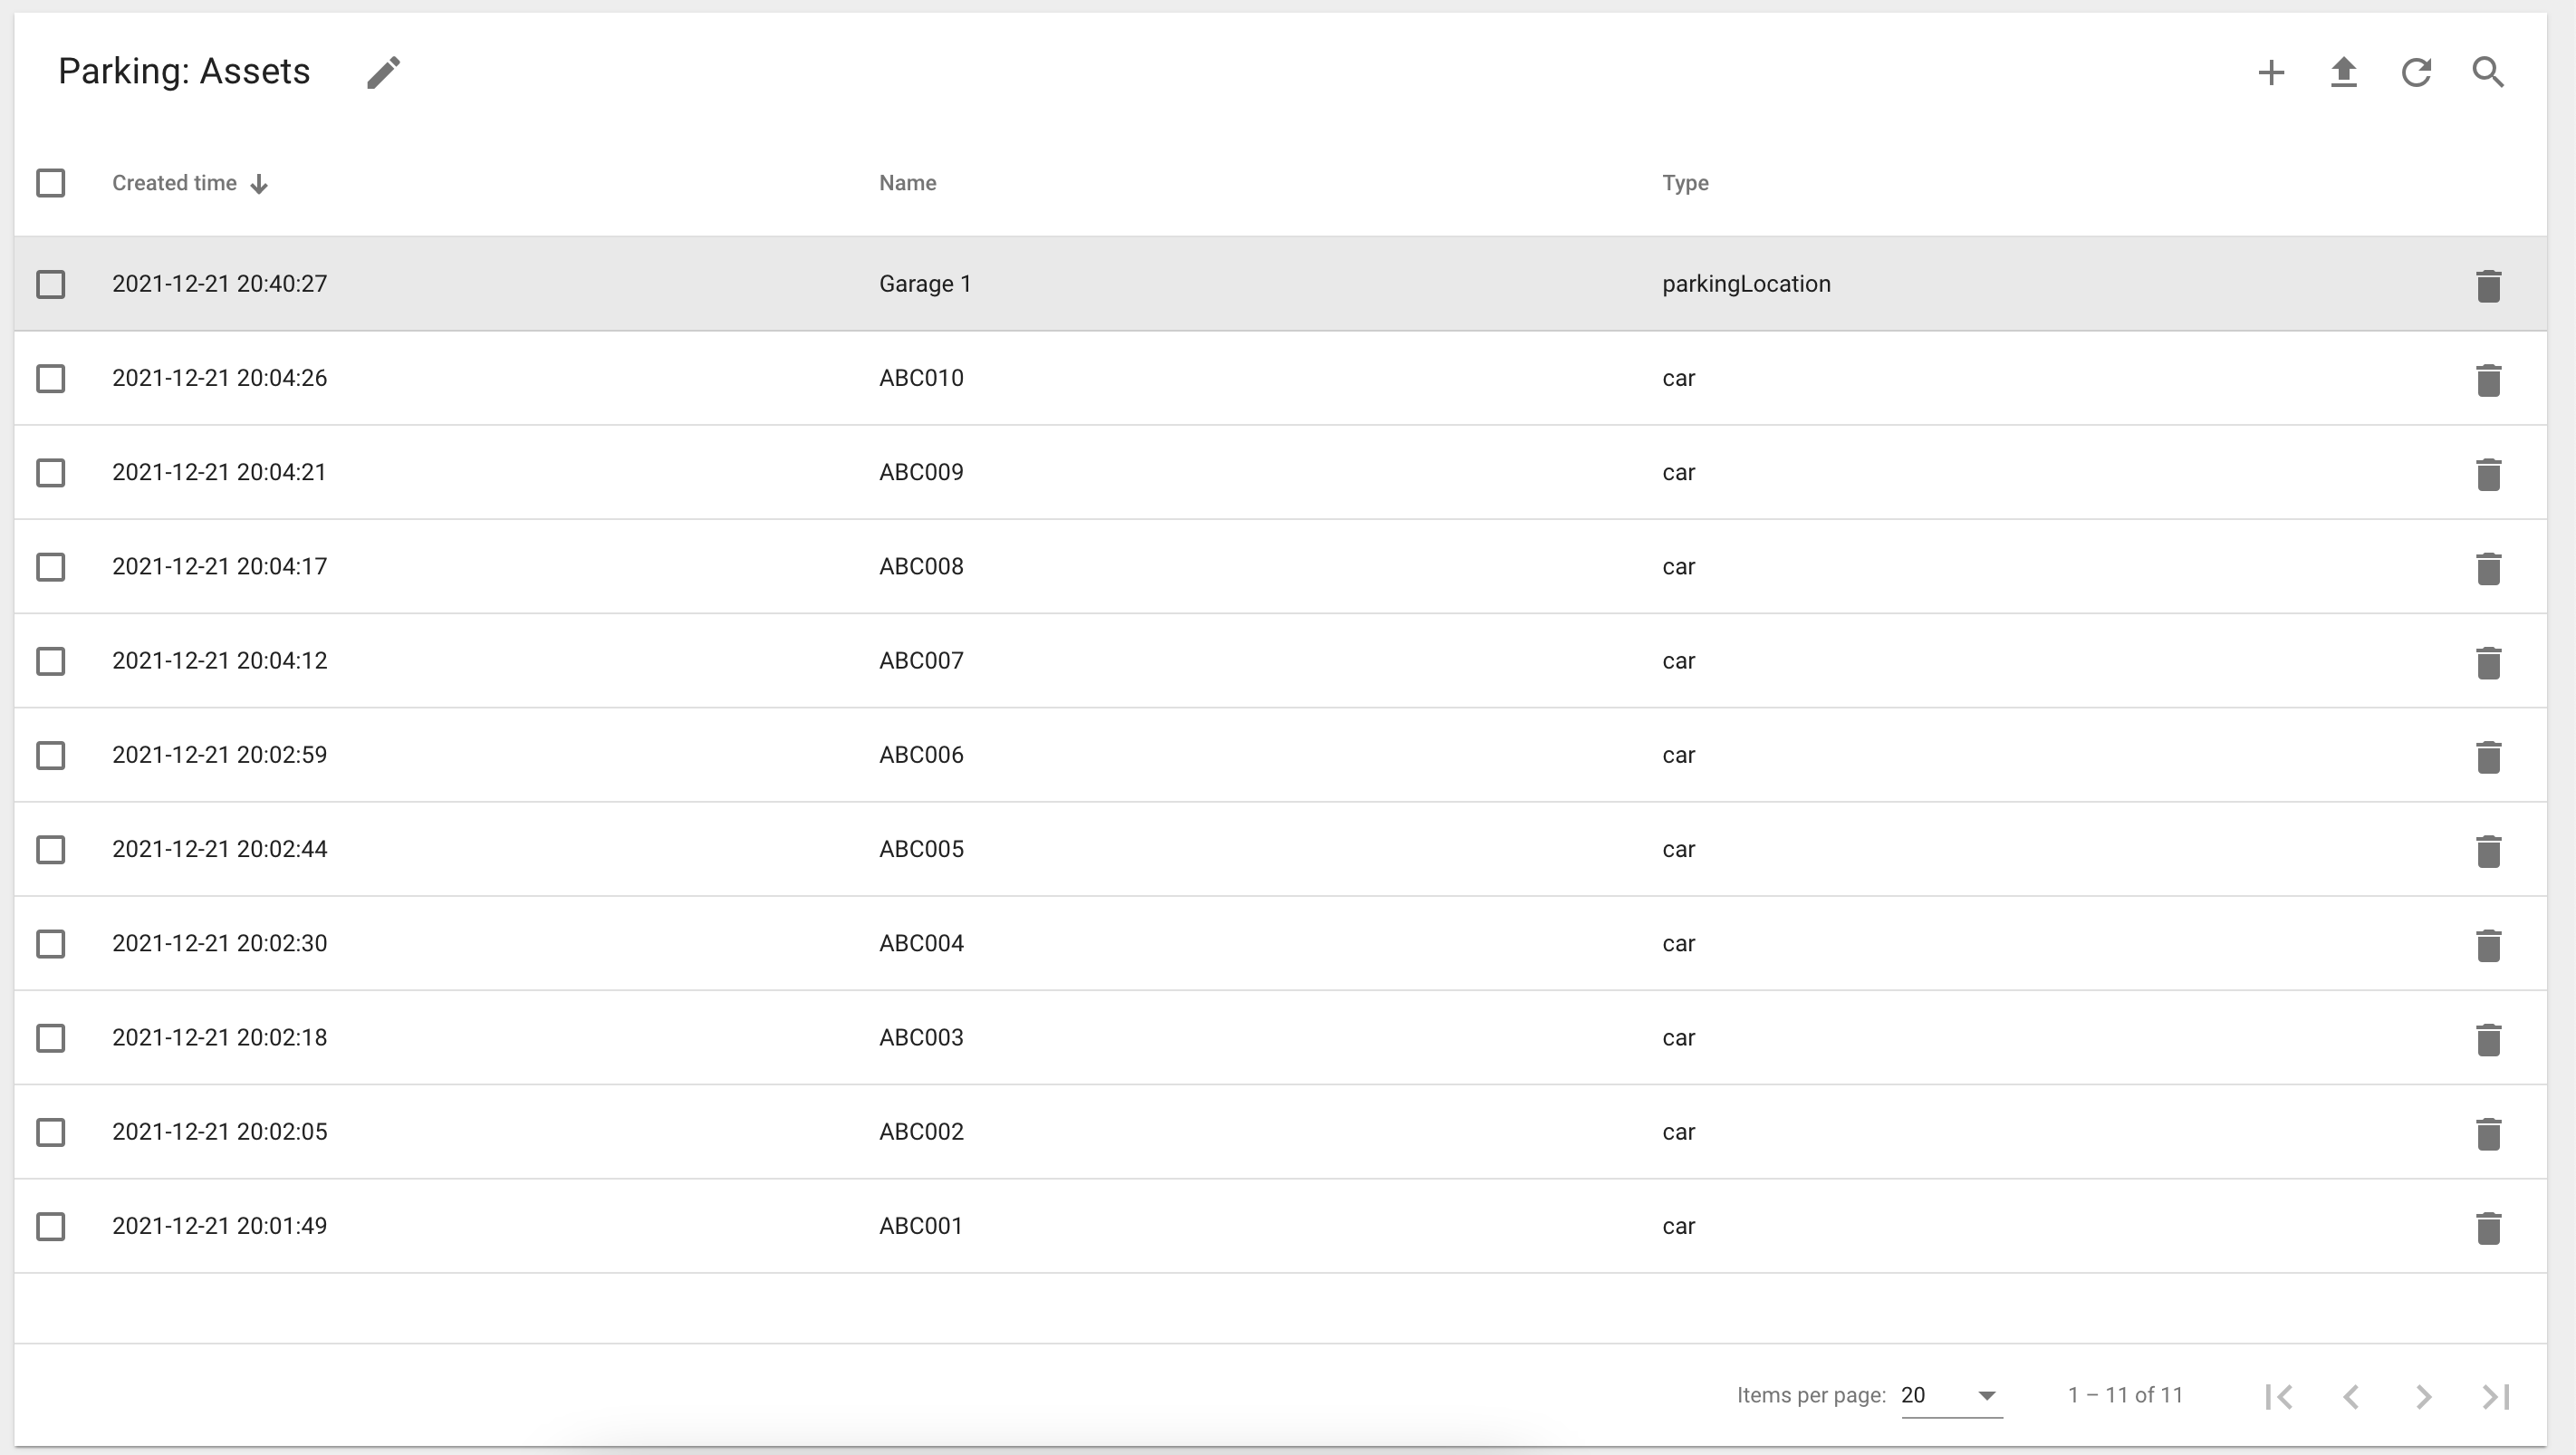
Assets
We also need to create a number of Assets for this to work as expected. What we need is:
- One asset for each garage. In this case we only have one garage which is named “Garage 1” and defined as the type “parkingLocation”.
- One asset for each car/vehicle. The name of the asset should match the license plate for the vehicle so that the data converter can match the camera reading against an asset. The type is set to car.
After the assets are created, then a relation is defined between “Garage 1” and each “car” asset.
What we also need to define on the “parkingLocation” assets is an attribute named “parkingSpaces” which tells how many parking spaces we have in that particular parkingLocation. - In this example I have set this number to 5 since that is the number of parking spaces that we have access to in “Garage 1”.
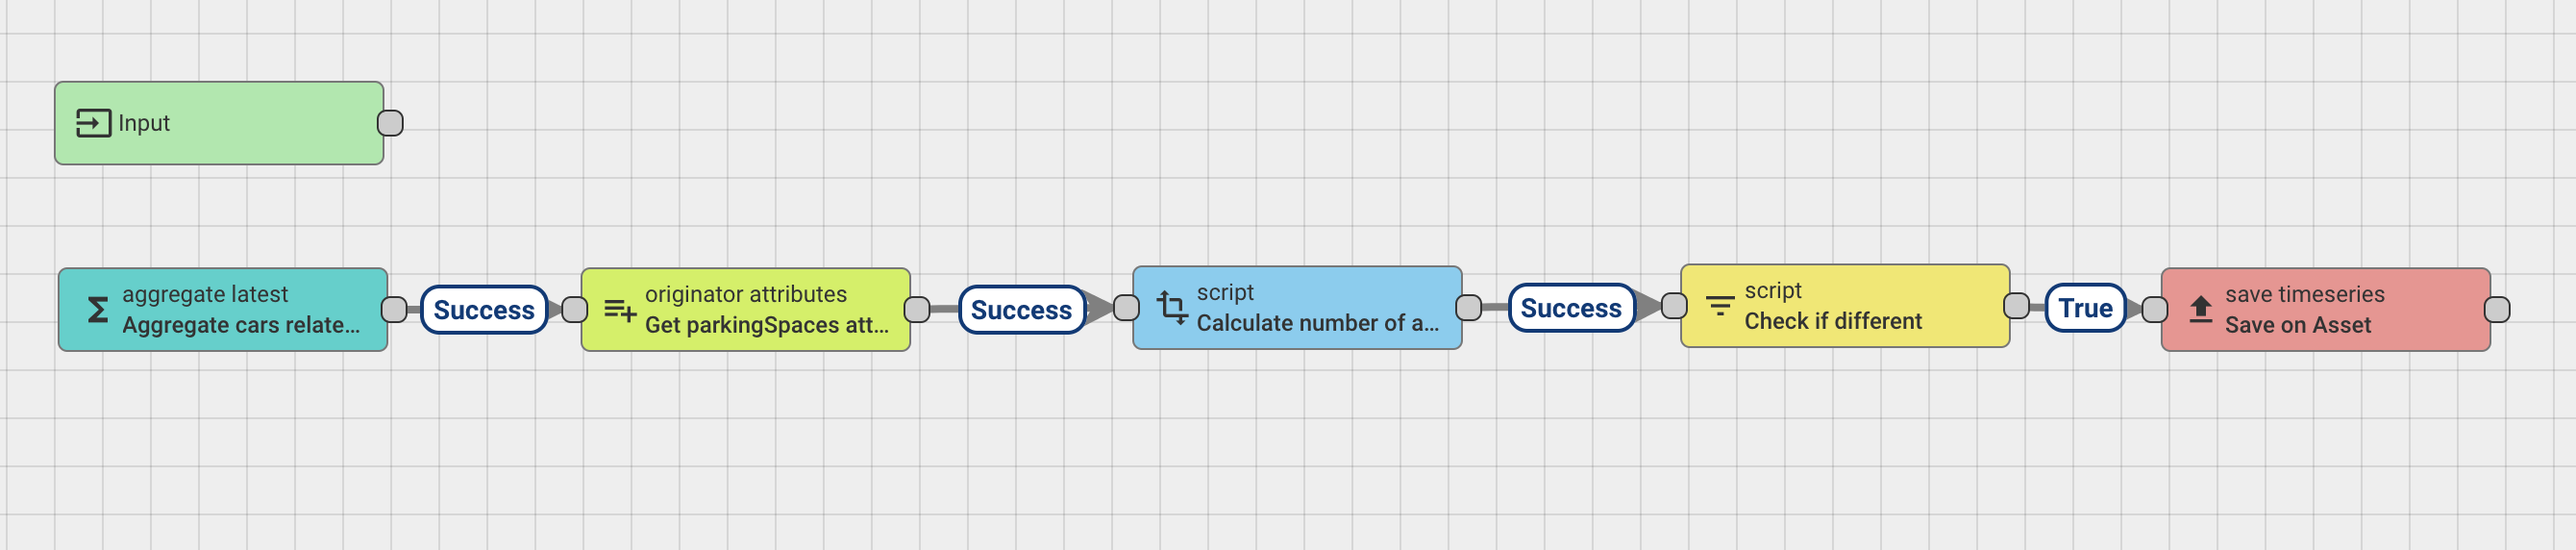
Rule chain
We create new rule chain which will be responsible for calculating the number of occupied parking spaces based on the parkedInGarage1 telemetry value on each asset related to “Garage 1”.
In short, we do the following:
- Aggregate Latest runs every 60 seconds and gets the parkedInGarage1 value for each “car” asset related to the “Garage 1” asset. It SUMS the value which is either “0” or “1” for each “car”. The SUM indicates how many “cars” which are considered to be “in” the garage.
- Originator Attributes will query the database to get the data from the “parkingSpaces” attribute which exists on the “Garage 1” asset. We need this information to be able to calculate the number of available parking spaces.
- Script performs the parkingSpaces - parkedInGarage1 math which returns availableParkingSpaces as a INT.
- Script checks if the new value is different from the old value. We do this check since we are running on an interval (60 seconds) and we only want to write to the database if there is a change.
- Save Timeseries performs a database write for the availableParkingSpaces value onto the “Garage 1” asset.
Dashboards
Two different dashboards were created to visualize the data. One dashboard is considered as an “admin dashboard” which requires login, while one is created as “public” which doesn’t require login and is intended to be used by employees so that they can determine if there are any available spaces before they enter the garage.
The Admin dashboard also provides an interface for the “administrator” to manually set a specific vehicle as in/out if any miscount would occur in the system/camera. The Admin dashboard also displays per-vehicle statistics.
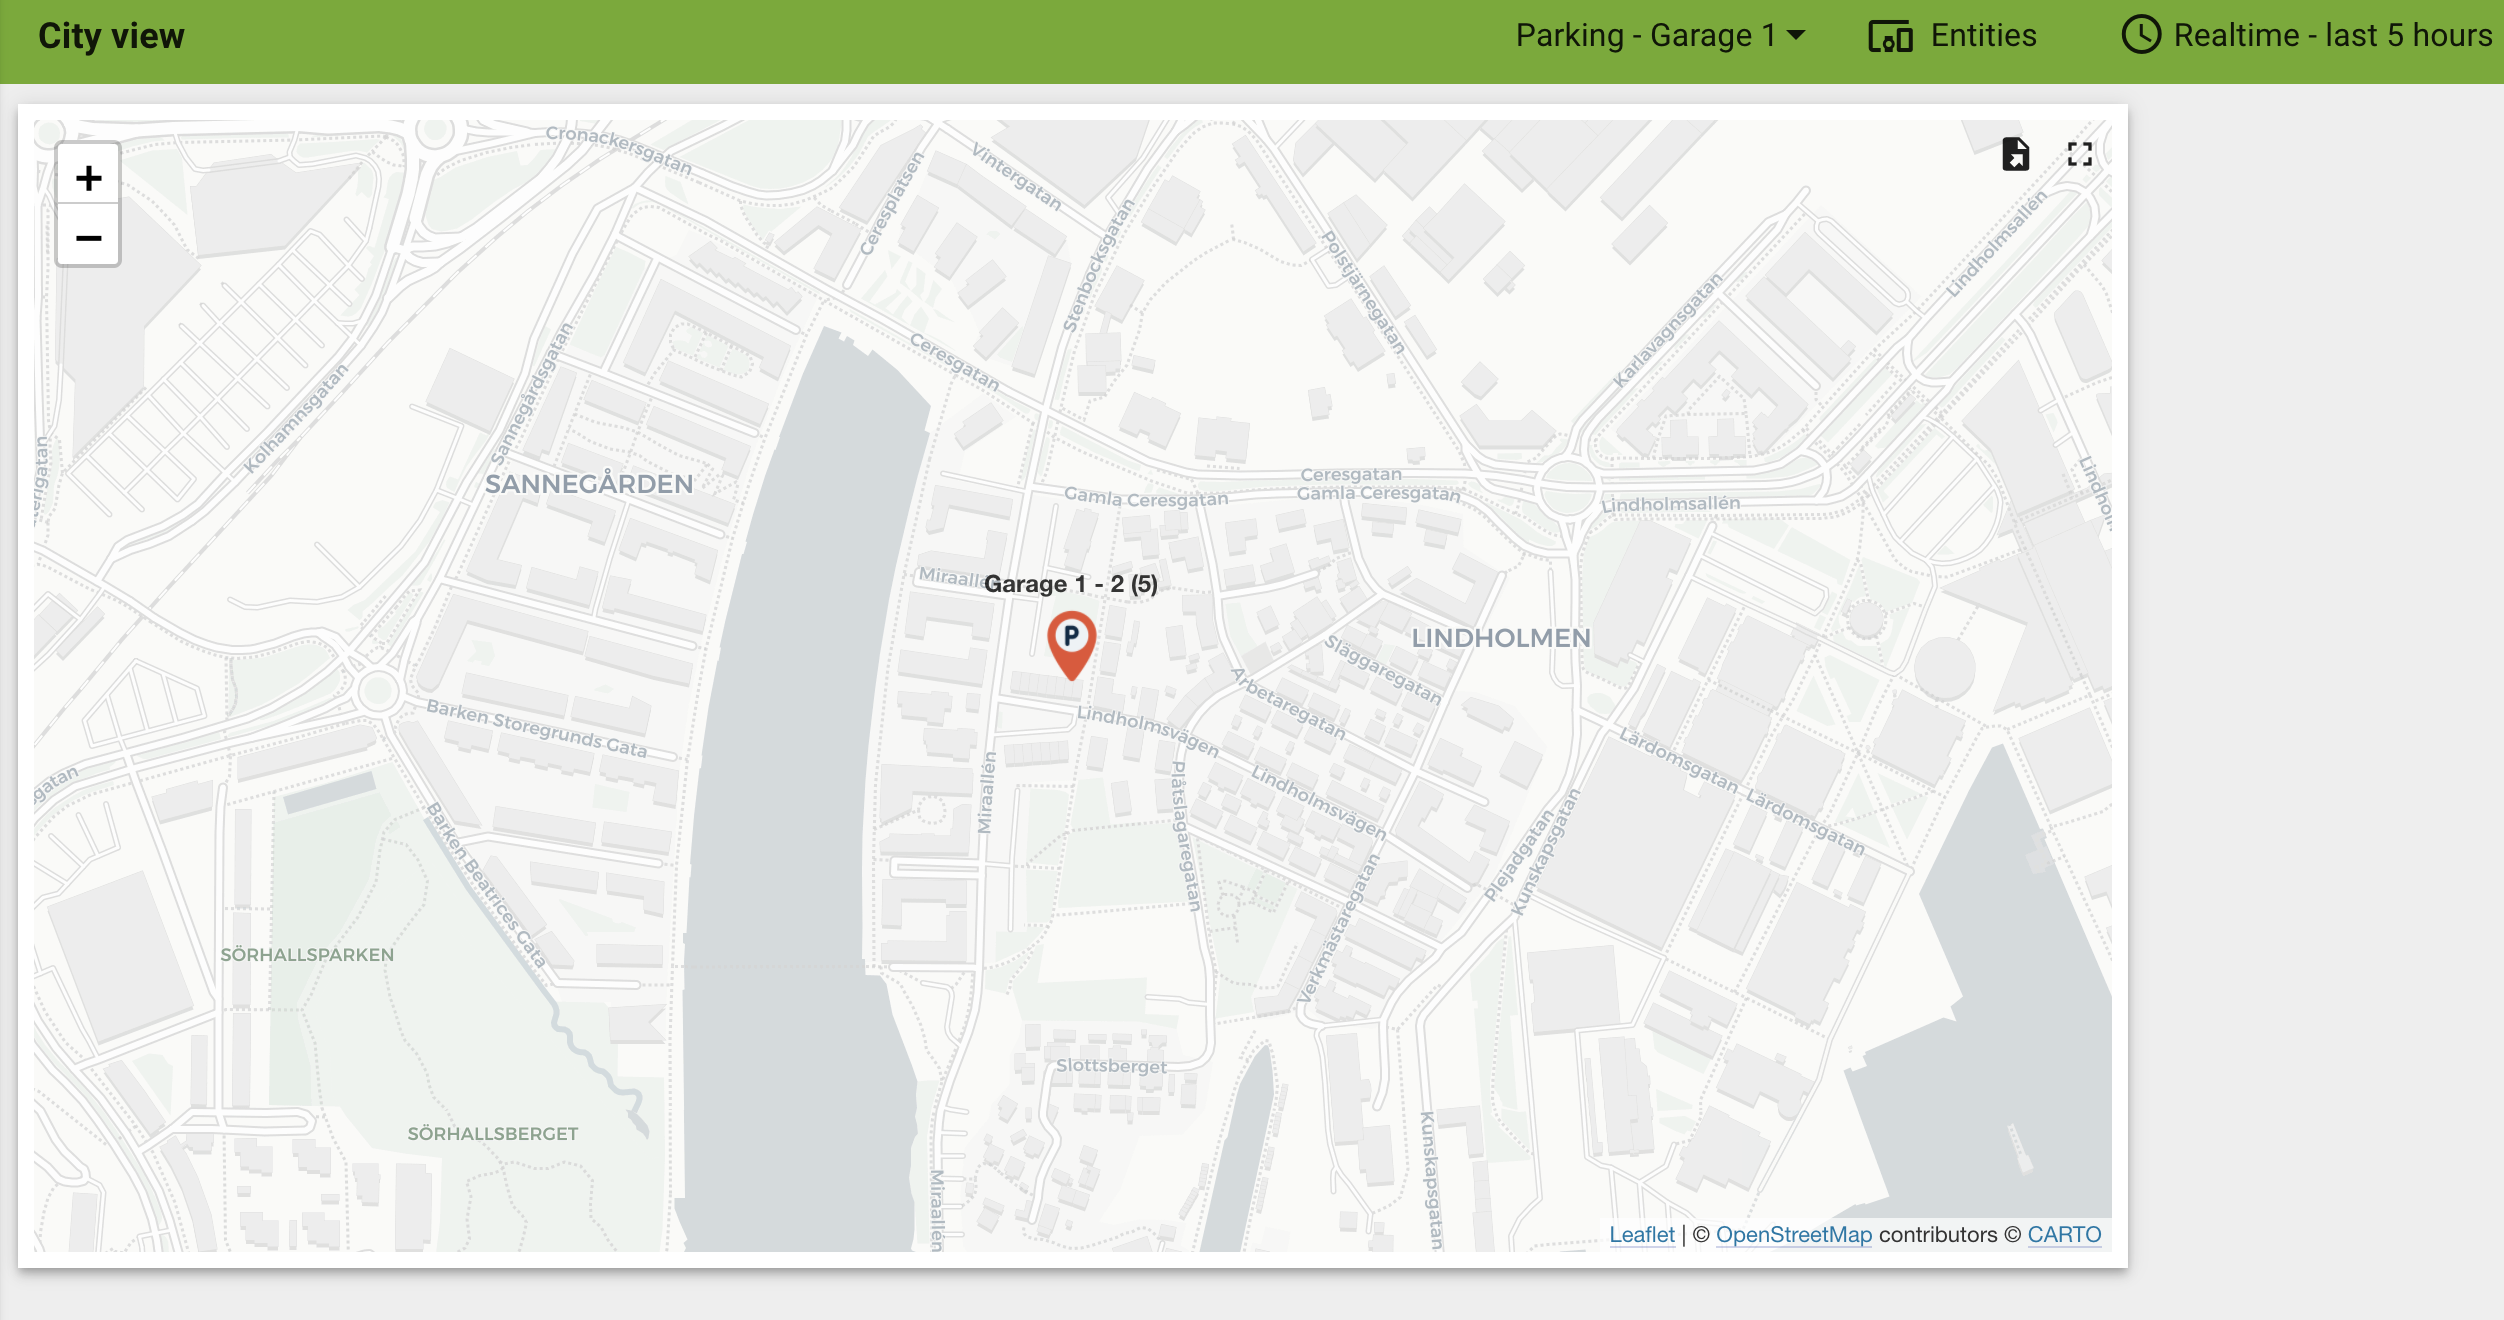
Admin dashboard - City view. Displays all assets of type parkingLocation based on their latitude/longitude attributes. The map shows the name, free spaces and the total amount of spaces as labels for each location:
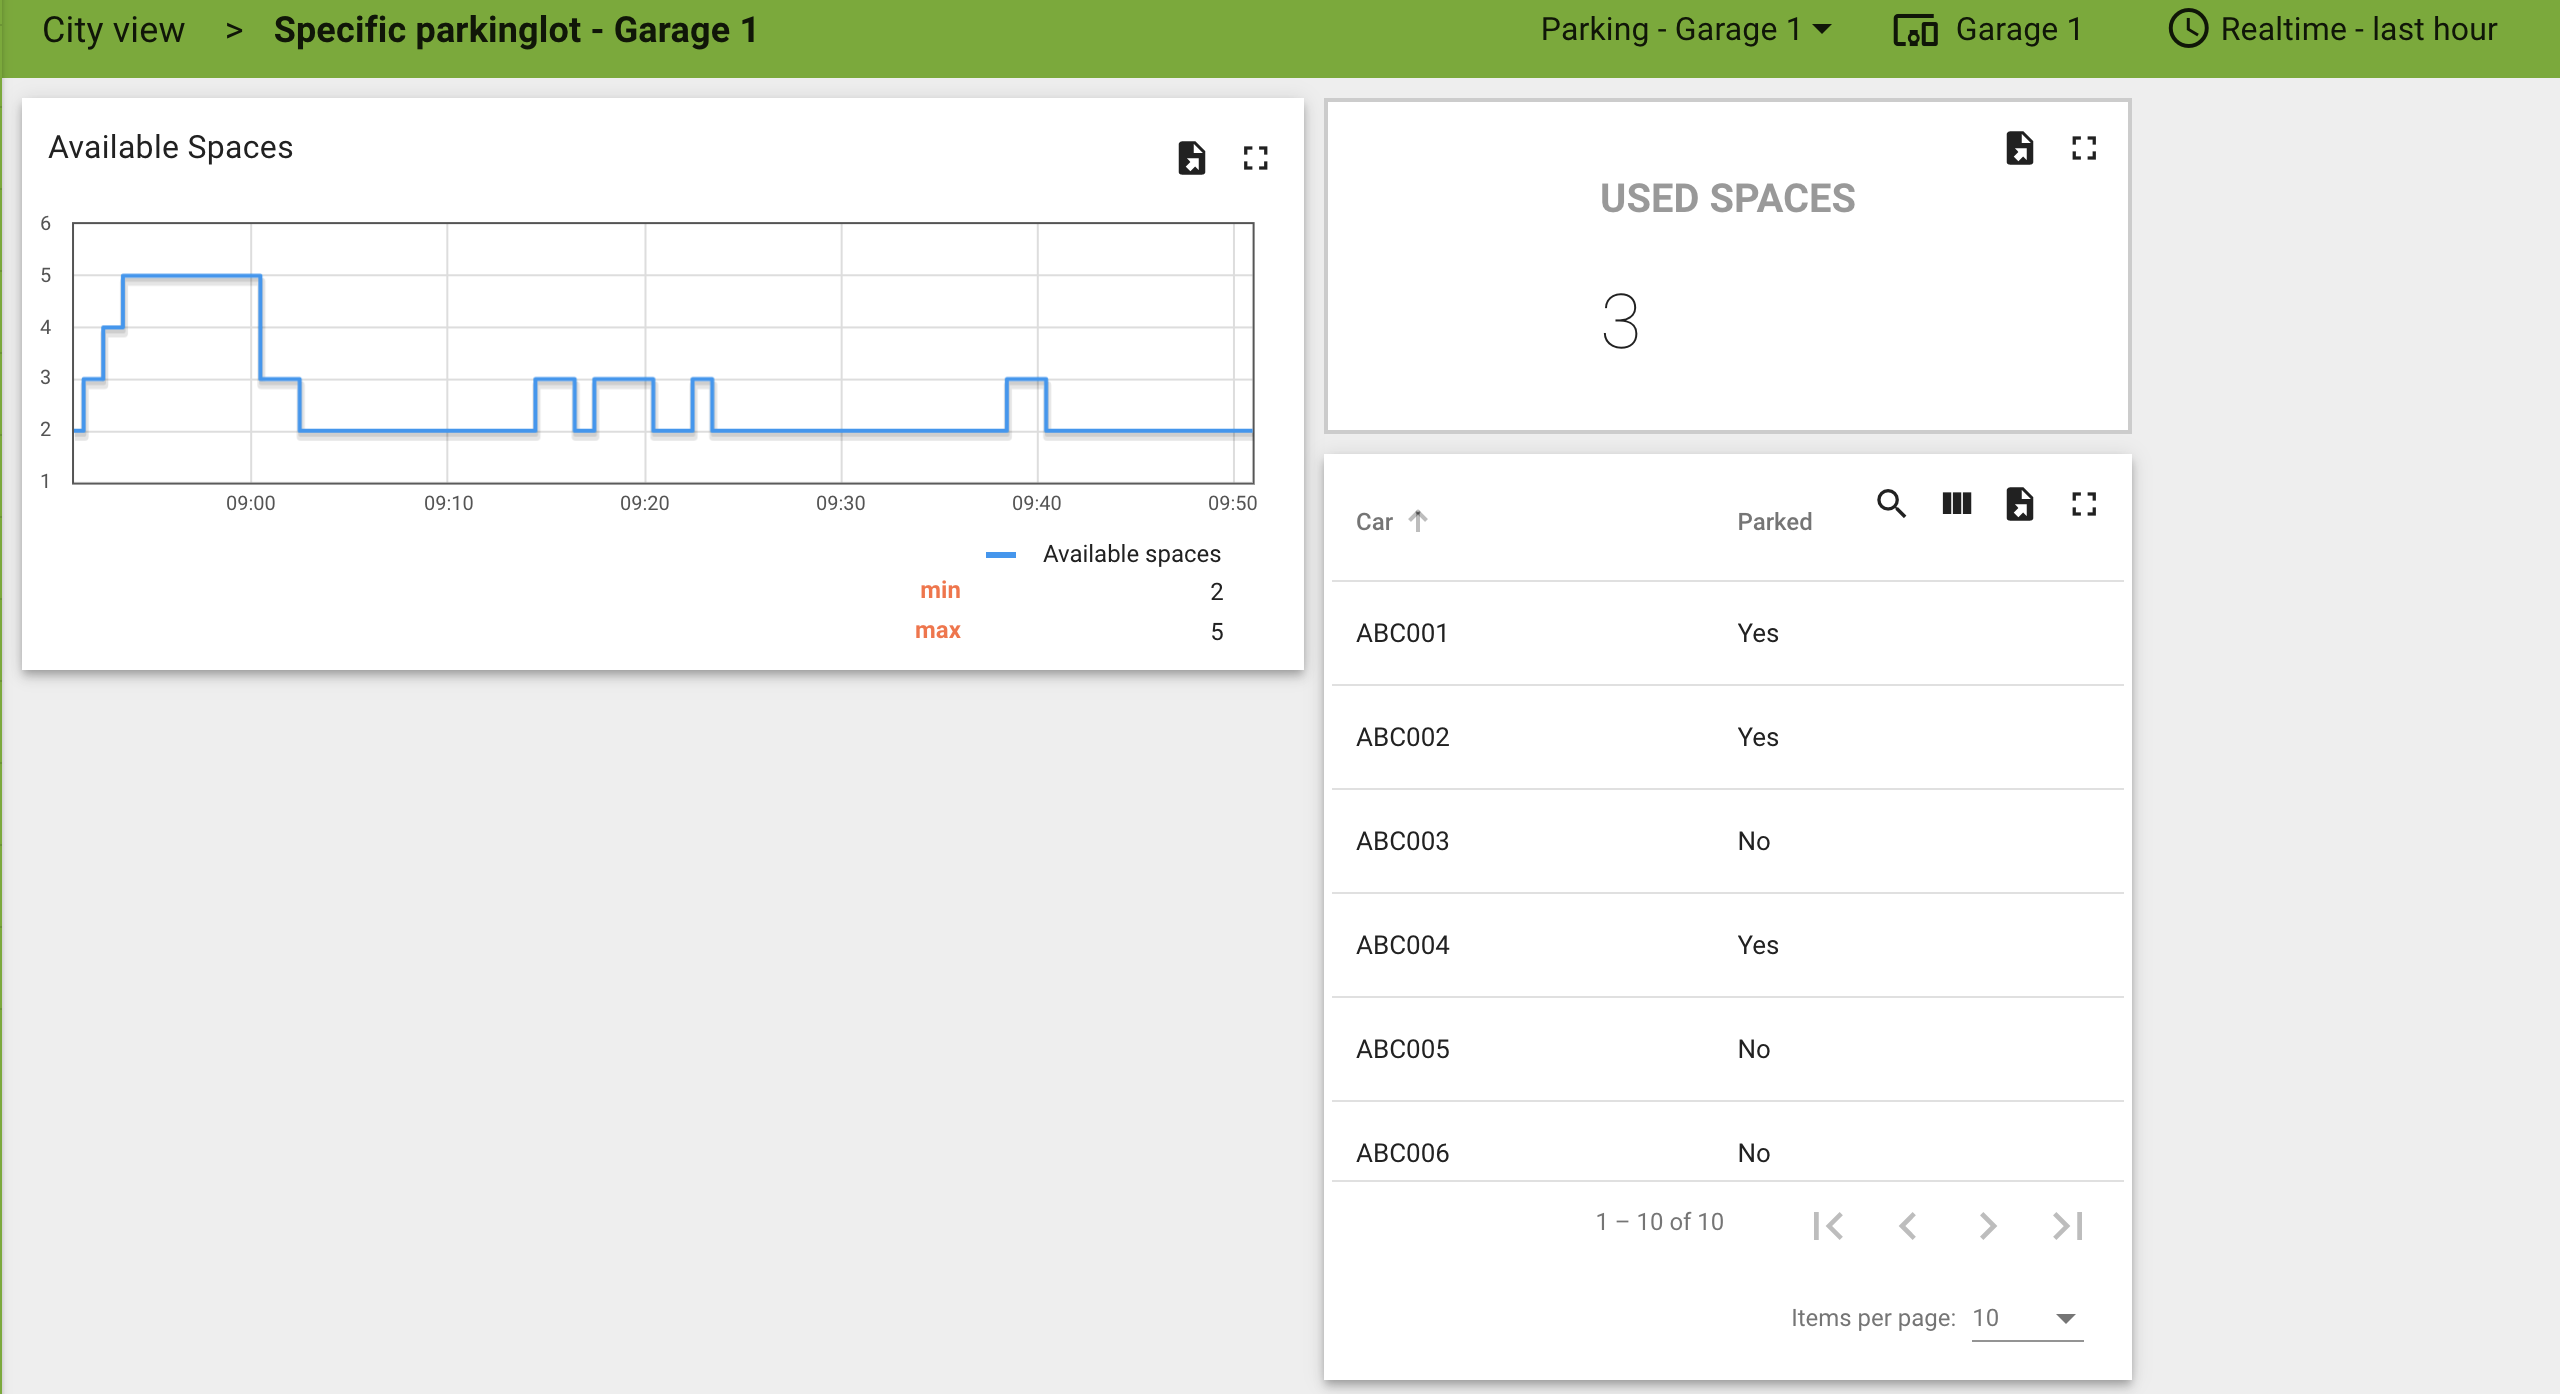
Admin Dashboard - Garage view. Shown after clicking “any” of the icons in the city view. This view shows a graph of the space utilization in the selected parkingLocation asset as well as a list of all the vehicle assets related to the parkingLocation. The list shows “parked” status for each vehicle asset:
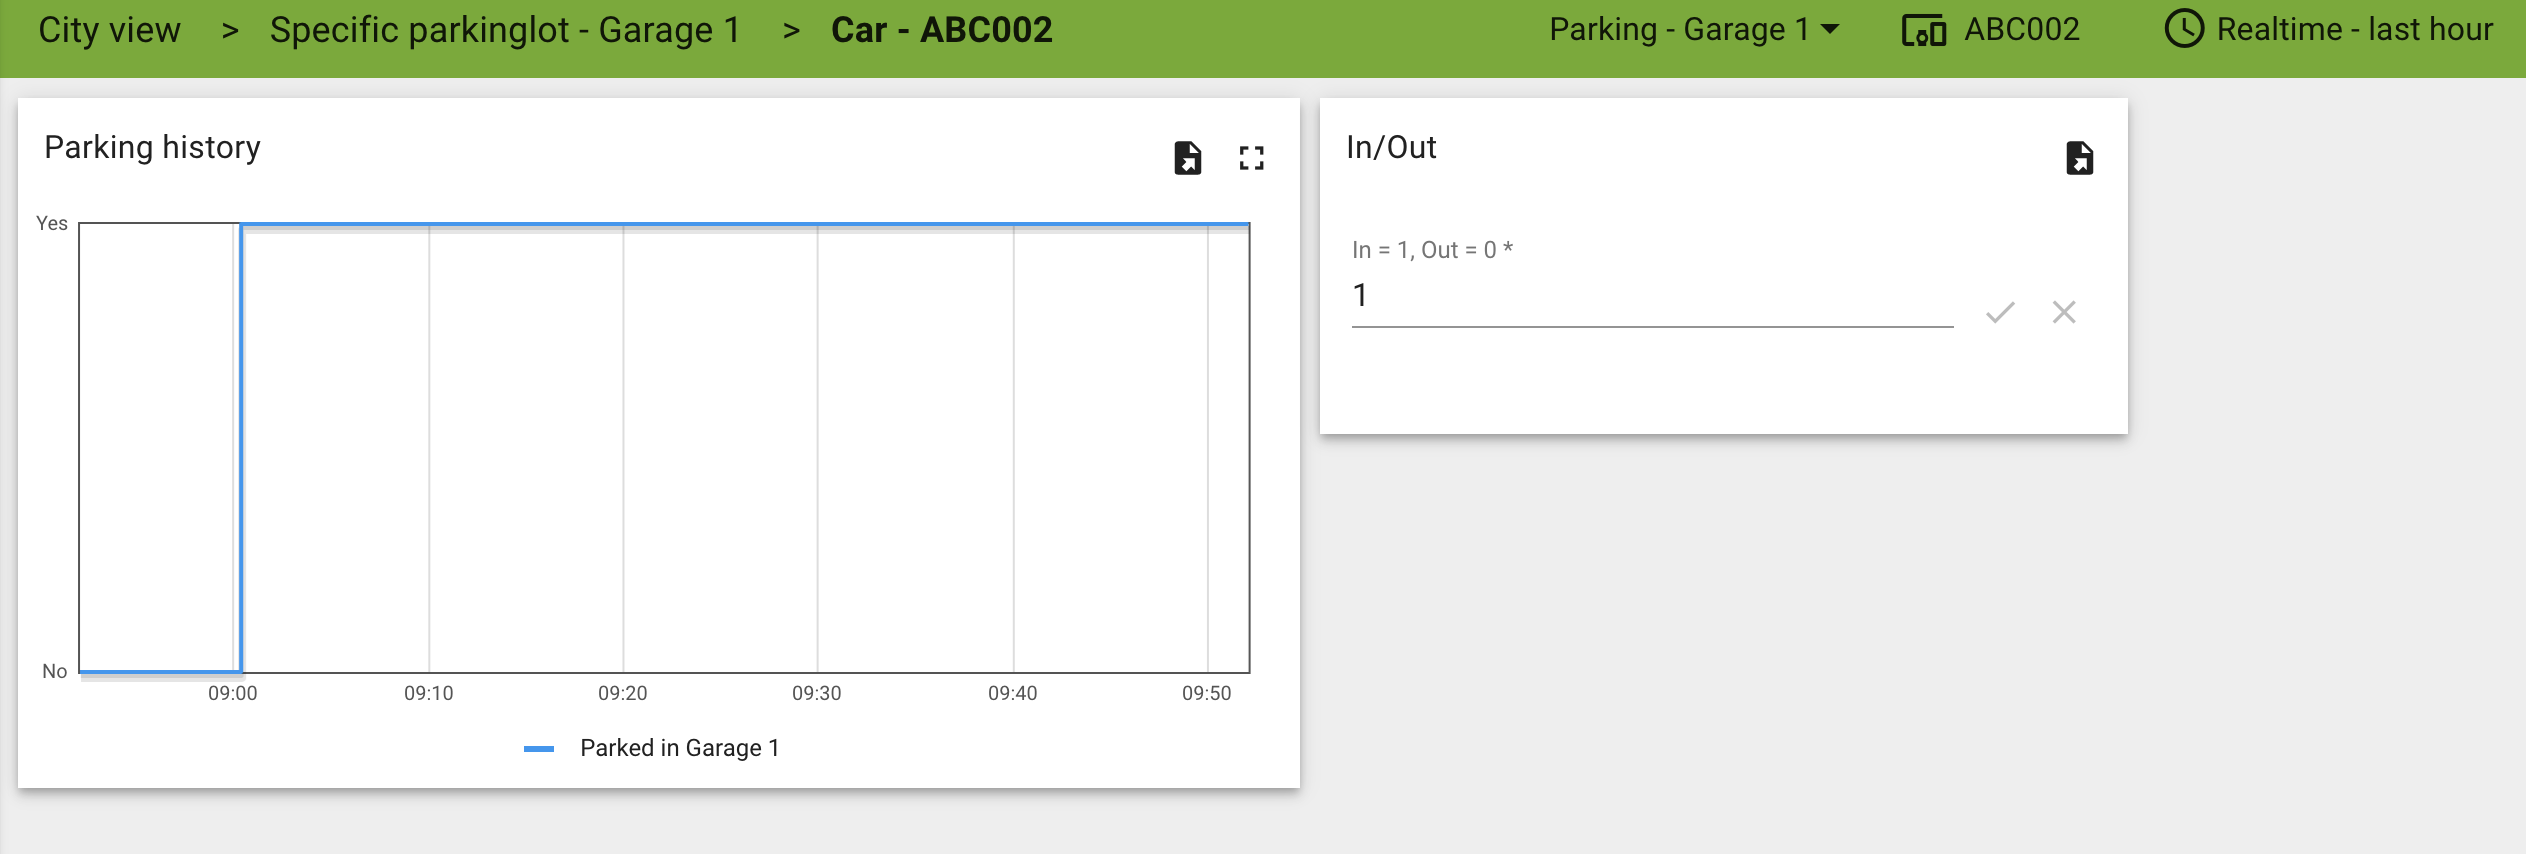
Admin Dashboard - Car view. This is shown after double clicking a vehicle in from the list in the garage view. This view shows more details about the selected vehicle and there is also an option to manually adjust the in/out status if needed:
Public Dashboard. A simple HTML page which is accessible thru a uniq URL. This page shows the current amount of free parking spaces and is intended to be used by staff who want to verify if there are any available parking spaces before they enter the garage:

Conclusion
In total I spent around 4 hours to create this fully working system by using ThingsBoard with the help of the payload from the Axis camera. This shows how powerful and easy it can be to build solutions when we use products which are customizable and does the “heavy lifting” for us.